


Halloween Sugar Cookies
Halloween is my absolute FAVORITE time to get creative in the kitchen, and there’s no better way to celebrate the spooky season than with delicious, beautifully decorated Halloween Sugar Cookies. These cookies are perfect for parties, gifts, or simply enjoying with family and friends. In this blog, I’ll show you how to make the perfect Halloween sugar cookies, complete with tips on royal icing and storage. So whether you’re hosting a Halloween Sugar Cookie decorating party, looking for a fun activity to do with your kids, or hoping to impress with your addition to a Halloween party, this Halloween sugar cookie recipe will be your new go-to!

How To Make Halloween Sugar Cookies
These Halloween Sugar Cookies are so much easier to make than you might think! The cookie dough comes together super easily and, unlike a lot of sugar cookies, these cookies are soft, tender, and chewy rather than hard and crispy. My other favorite part about this recipe is that the cookie itself mimics more of a shortbread, so it’s not overly sweet, which makes it the PERFECT pairing for a deliciously smooth royal icing :) Let’s break it down!
- Preheat your oven to 400 degrees F.
- Using a stand mixer fitted with the paddle attachment, cream together the butter and confectioner’s sugar on low speed until smooth. Scrape down the sides and bottom of the bowl with a silicone spatula.
- Add in the egg and vanilla. Mix for about 2 minutes until the mixture is light and fluffy. Scrape down the sides of the bowl. Keep in mind, you can use any flavor extract you want! Feel free to substitute the vanilla extract for almond extract or whatever flavor you wish to achieve :)
- In a separate small bowl, whisk together the flour, baking powder, and salt.
- Add the dry ingredients to the wet mixture. Mix on low speed until the dough starts to pull away from the sides of the bowl, about 1 1/2 minutes. Scrape down the sides and bottom of the bowl.
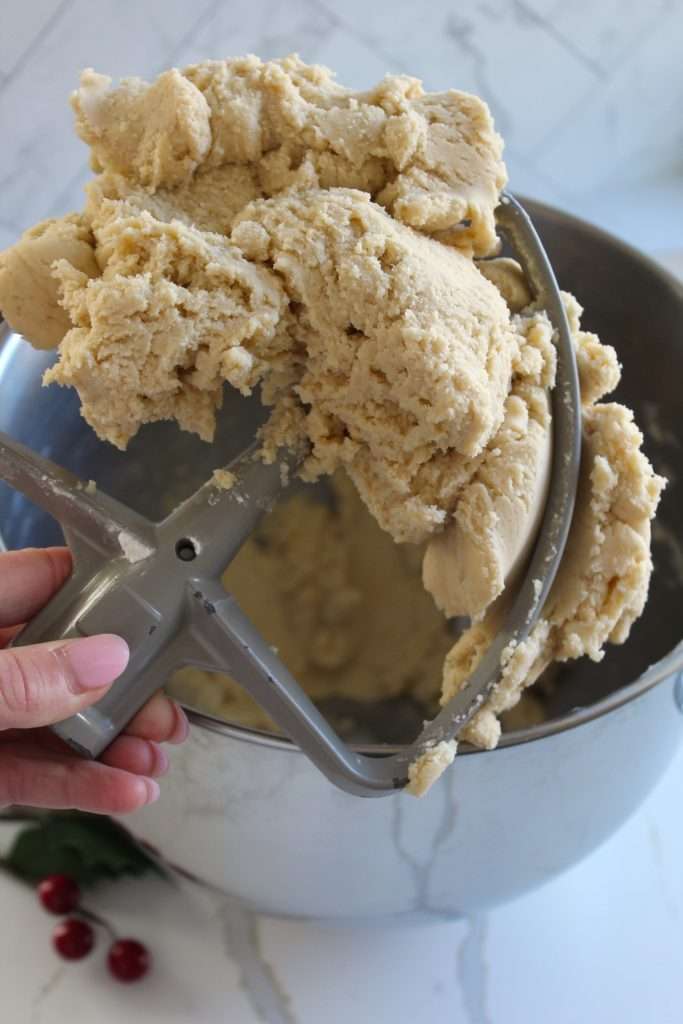
- Transfer the cookie dough onto parchment paper. Place another piece of parchment paper on top and roll the dough out to about 1/4″ thick. This thickness ensures soft, chewy cookies – such a game changer!
- Place the rolled-out dough onto a cookie sheet and chill in the fridge for at least one hour. If chilling for longer, wrap the cookie sheet in plastic wrap to prevent the dough from drying out.

Use cookie cutters to cut out your shapes. Re-roll the scraps to use all the dough.
Place the cutout cookies on a cookie sheet lined with parchment paper, about 2″ apart. Chill in the fridge for another 10-15 minutes before baking.
Bake the cookies for 8-9 minutes or until golden brown on the bottom. Adjust the baking time based on the size of your cookie cutters.
Let the cookies cool on a cooling rack completely before decorating!
How to Store Halloween Sugar Cookies
Store your decorated Halloween sugar cookies in an airtight container at room temperature. They will stay fresh for up to a week. If you need to stack them, place a piece of parchment paper between each layer to prevent the decorations from sticking and smudging. Make sure that your royal icing has set completely before storing or stacking, or else you will indent and smoosh the designs.

Royal Icing Consistencies
Outlining Consistency:
This should be thicker and hold its shape well when piped. It is used to create a barrier for the flood icing.
Flooding Consistency:
This should be thinner and flow smoothly to fill in large areas. It should settle into a smooth, even layer within a few seconds.
How Long Does Royal Icing Take to Harden?
Royal icing takes a few hours to harden at room temperature. For best results, let the decorated cookies sit overnight before stacking or storing them. You can tell when the icing has hardened by lightly tapping on the icing to make sure that it doesn’t leave an indent.

How to Decorate Halloween Sugar Cookies
1. Once the cookies are cooled, dye your icing using gel food dye to make orange, black, purple, etc. Then use the outlining consistency icing in your piping bag to create borders around your cookie shapes.
2. Fill in the outlined areas with the flooding consistency icing.
3. Add details using different colors and consistencies as desired. Let each layer dry before adding more decorations to avoid smudging.
What is Meringue Powder?
Meringue powder is a dried egg white substitute used in royal icing. It provides stability and structure to the icing, ensuring it sets properly. It also eliminates the need to use raw egg whites, making the icing safe to consume.
Enjoy making and decorating these delightful Halloween sugar cookies! Whether you’re hosting a party or just enjoying a fun baking session, these cookies are sure to be a hit.
More Recipes Like These Halloween Cookies You Might Enjoy

Cinnamon Sugar Halloween Linzer Cookies

Chocolate Jack-O-Lantern Linzer Cookies

Jack Skellington Linzer Cookies

Pumpkin Chocolate Chip Cookies

Chocolate Pumpkin Patch Cookies (Charlie Brown)

Pillsbury Double Chocolate Chip Cookies
Products I Use

Halloween Sugar Cookies
Join my creative baking community! In depth courses, direct access to me, and more 🤎 Click here to join!
15-18
servings20
minutes8
minutesKeep the screen of your device on.
Ingredients
1 cup unsalted butter, room temp.
1 1/2 cups confectioner’s sugar
1 egg, room temp
3 tsp. vanilla extract
3 cups all-purpose flour
1 tsp. baking powder
1/2 tsp. salt
- Royal Icing
3 cups confectioner’s sugar
2 1/2 Tbsp. meringue powder
5-6 Tbsp. water
Directions
- Using a stand mixer fitted with the paddle attachment, cream together the butter and confectioner’s sugar at low speed until it is smooth. Be sure to scrape down the sides and bottom of the bowl with a silicone spatula throughout this recipe to make sure that everything is evenly combined.
- Add in the egg and vanilla. Mix for about 2 minutes until the mixture is light and fluffy. Scrape down the sides of the bowl.
- In a separate small bowl, whisk together the flour, baking powder, and salt.
- Add the dry ingredients to the wet. Mix on low speed until the dough starts to pull away from the sides of the bowl. About 1 1/2 minutes. Remember to scrape down the sides and bottom of the bowl.
- Transfer the sugar cookie dough on top of parchment paper. Place another piece of parchment paper on top and roll the dough out to about 1/4″ thick. The key to getting these so soft in the center is the width. Rolling to 1/4″ thickness is what you want.
- Once the dough is rolled out between two pieces of parchment paper, place onto a cookie sheet and let it chill in the fridge for at least one hour. If you plan on preparing the dough ahead of time and will chill it for longer, wrap the cookie sheet in plastic wrap to prevent the dough from drying out.
- Now that the dough has chilled and is nice and firm, use cookie cutters to cut out all of your shapes. You can ball up the scraps and re-roll the dough to use all of it up.
- Place the cutout cookies on a cookie sheet fitted with parchment paper about 2″ apart. Let it sit in the fridge for about 10-15 minutes before baking.
- Bake the cookies at 400 degrees F for about 8-9 minutes or until golden brown on the bottom. Depending on the size of the cookie-cutter, you may need more or less time. Judge the doneness of the cookie based on the bottom side of the cookie – we want a nice golden color.
- Let the cookies cool on a wire rack and allow them to cool completely before decorating.
- Royal Icing
- In the bowl of a stand mixer fitted with the paddle attachment, mix together the confectioner’s sugar and meringue powder on low speed.
- Add the water 1 tablespoon at a time. Mix until the royal icing is smooth. Scrape down the sides of the bowl to ensure that everything is mixing evenly together.
- Judge the consistency of the royal icing by lifting up the paddle attachment and taking notice of the ribbons the icing falls. You don’t want a thin, watery consistency or a super thick, hard consistency. The icing should fall in smooth ribbons that disappear into the icing after a few seconds.
- While you color your icing, or do the dishes, etc., be sure to keep the bowl of icing covered at all times with a damp rag. This will prevent the top of the royal icing from hardening and crystallizing.
- Dye however many colors you need and place them into individual piping bags.
- Pipe an outline around each cookie, then use your flood icing that we learned about above to fill each cookie.
- The cookies will take a few hours or overnight to set.
- Allow the cookies to set completely at room temperature before stacking or storing.
Equipment
 Tipless Piping BagsFind On Amazon
- Americolor Food GelFind On Amazon
- Parchment PaperFind On Amazon
- Rolling PinFind On Amazon
- Royal Icing ScribesFind On Amazon
- Halloween Cookie CuttersFind On Amazon


Did you make this recipe?
I love seeing what you bake on socials! Just tag @thesqueakymixer


