

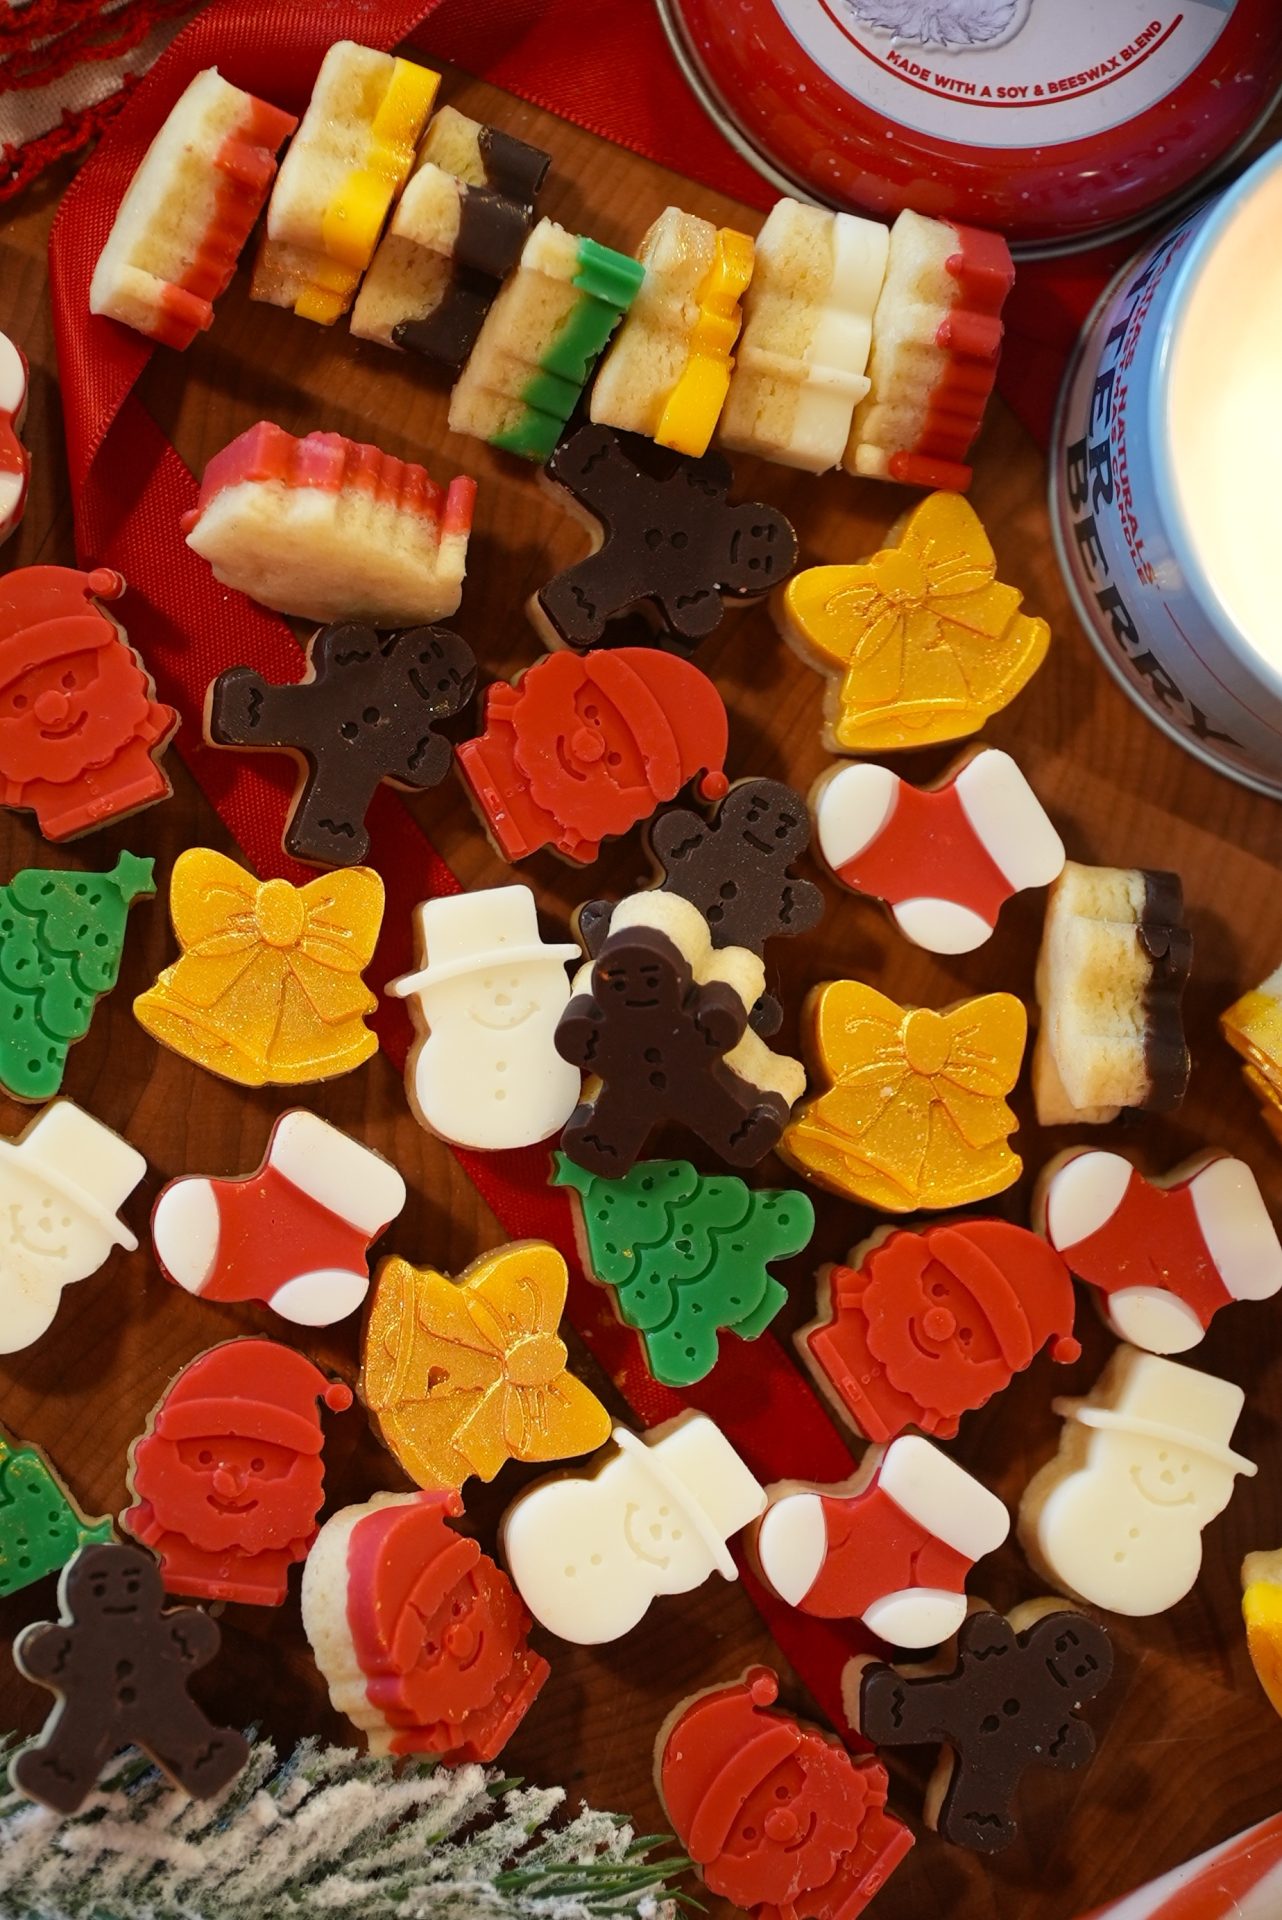
Mini Christmas Sugar Cookies
These Mini Christmas Sugar Cookies, though small, are SO delicious and festive. PERFECT for this time of year! I had so much fun making these delicious little treats, and I hope that you enjoy this recipe as much as I do. I made this Christmas Sugar Cookie recipe using one of my favorite soft and tender sugar cookies. They’re decorated with colorful candy melts. Of course, like most of my recipes, feel free to customize it to your liking. You can use semi-sweet chocolate chips or white chocolate to decorate these if you aren’t a fan of candy melts. Or you can add your favorite festive spices to this sugar cookie recipe for an extra holiday-flavored twist.

How To Make Mini Christmas Sugar Cookies
These cookies are extremely easy to make and are a GREAT make-ahead treat perfect for the busy Holiday season.
- Prep the mold – Preheat the oven to 350°F, lightly grease your mini Christmas silicone mold, and place it on a cookie sheet. The cookie sheets help to easily move the mold without smudging the cookies.
- Mix the dry ingredients – In a medium bowl, whisk together flour, baking powder, and salt.
- Cream butter + sugar – Using an electric mixer, beat the butter and sugar for about 2 minutes, until light and fluffy.
- Add egg + vanilla – Mix until fully combined, the dough will be soft :)
- Combine dough – Add dry ingredients to wet and mix until a thick, slightly sticky dough forms.
- Pipe into the mold – Transfer dough into a piping bag and pipe into each cavity, filling every detail. Use a cake scraper to level the top.
- Bake – Bake 8–10 minutes, then allow cookies to cool in the mold for 10 minutes before removing.
- Decorate – Melt candy melts in separate bowls, pipe into the mold indentations, gently press the matching cookie on top, freeze for 15 minutes, then pop them out!!
- Optional (but wicked cute!) – Brush bells or stars with gold luster dust for a magical finishing touch!

Recipe Tips
- Use room-temperature butter — Cold butter won’t cream properly, leading to dense cookies.
- Don’t skip greasing the mold — Even silicone molds can stick.
- Pipe instead of spooning — It ensures clean details and no air pockets.
- Don’t overbake — Pull them when the edges are set; they’ll finish baking as they cool.
- Let cookies cool fully before decorating — Warm cookies will melt the candy melts.
- Work one color at a time — This keeps everything neat and manageable.

How to Store Mini Christmas Sugar Cookies
- Room temperature: 4–5 days in an airtight container
- Refrigerator: Up to 1 week
- Freezer (undecorated cookies): Up to 2 months – be sure to thaw before decorating
- Freezer (fully decorated): Lay flat in a freezer-safe container, separated with parchment paper :)
- Avoid storing near heat sources — candy melts can soften very easily!
Recipe Variations
- Swap extracts – Almond, peppermint, or butter extract adds festive flavors :)
- Add sprinkles – Press them into the dough before baking.
- Make chocolate sugar cookies – Replace 2 tbsp flour with cocoa powder.
- Use royal icing instead of candy melts – For a matte, detailed finish.
- Try different molds – Snowflakes, gingerbread men, ornaments, stockings—so fun!

Tips for Working with Candy Melts
- Melt in 30-second increments, stirring between each.
- If too thick, add 1/2 tsp coconut oil to thin. If you don’t like coconut oil or have an allergy, you can also use vegetable oil
- Pour into a piping bag or squeeze bottle to control placement.
- Don’t overfill the molds – a thin layer is enough to adhere the cookie.
- Freeze after assembling – it helps the design release perfectly.
- Store leftover melts in airtight bags – they re-melt beautifully!
Why You’ll Love These Mini Christmas Sugar Cookies
- No rolling or cutting! This makes this recipe extremely easy and a fun one to have your kids join in on and enjoy the fun :)
- Perfect bite-sized portions, perfect for gift-giving favors!
- Kid-friendly decorating, easy, fun, colorful, and SO delicious! :)
- Ideal for holiday parties & cookie exchanges!
More Holiday Recipes You Might Enjoy!

Chocolate Peppermint Brownies

Eggnog Custard Pie

Snowman Macarons

Gingerbread Macarons

Christmas Tree Brownies

Snow Globe Sugar Cookies
Mini Christmas Sugar Cookies
Join my creative baking community! In depth courses, direct access to me, and more 🤎 Click here to join!
72
servings10
minutes8
minutesKeep the screen of your device on.
Ingredients
1 1/2 cups all-purpose flour
1 tsp. baking powder
1/4 tsp. salt
1/2 cup unsalted butter, room temperature
1/2 cup granulated sugar
1 egg
1 tsp. vanilla extract
- Decorating
1/4 cup red candy melts
1/4 cup green candy melts
1/4 cup yellow candy melts
1/4 cup brown candy melts
1/4 cup white candy melts
gold luster dust (optional)
- Silicon Mold
Directions
- Preheat the oven to 350 degrees F and lightly grease a mini Christmas silicone mold. Place the mold onto a cookie sheet. Set aside. Find the mold I used for these cookies on Amazon, here!
- In a medium-sized bowl, whisk together the flour, baking powder, and salt. Set aside.
- In a separate, large bowl, use an electric mixer to cream together the butter and the sugar. About 2 minutes.
- Scrape down the sides of the bowl, then add in the eggs and vanilla. Mix to combine.
- Pour the dry ingredients into the wet mixture and mix until a soft, fully combined dough forms. The dough will be sticky – don’t worry.
- Place the dough into a piping bag. One at a time, pipe the cookie dough into each mold. Make sure to pipe the cookie dough into each crevice.
- Use a cake scraper to flatten and spread the cookie dough evenly into each mold.
- Bake for 8-10 minutes. Once the cookies come out of the oven, allow them to sit in the mold for about 10 minutes before removing.
- Once the cookies have set, gently pop them one at a time out of the mold. Allow the cookies to cool completely before decorating.
- One color at a time, melt the candy melts in 30-second increments, mixing between each time until completely smooth. Place each color into a piping bag.
- Pipe the colors into the mold, then gently press the corresponding cookie into the mold. Do not press down too much to squish the candy melts out of the sides, just enough so that the cookie and candy melts meet.
- Transfer the cookies to the freezer for at least 15 minutes to set. Then gently pop the cookies out of their molds. I brushed gold luster dust on top of the bells for a nice golden touch. This is optional, but so fun! Find the brand of gold dust I used on Amazon, here!
Equipment
 Christmas Silicon MoldsClick here to purchase

Did you make this recipe?
I love seeing what you bake on socials! Just tag @thesqueakymixer


Made it according to the recipe and it turned out so cute! Fair warning to anybody like me who is super lazy; premade cookie dough will not work. Tried it, turned out terrible, lesson learned. You have to use the recipe’s cookie recipe. Which is wonderful btw!
I just realised the recipe calls for only ONE egg, but in your video on Instagram it looks like you use two eggs! No wonder it wasn’t thin enough! You should fix the recipe here!
Hi Laura,
It clearly states she doubled the recipe on the instagram video. That’s why there are 2 eggs. The recipe is fine as is.
Merry Christmas!
Hi Laura, please read the caption to the Instagram video you’re referencing where I clarify that I doubled the recipe in the video. The recipe here is correct :) I’m sorry you had trouble piping the dough. It is a thick dough for sure so it’s certainly not going to be easy as buttercream to pipe but with that being said, I find it easiest to work with small amounts of dough at a time so that it’s easier to pipe. I do not recommend adjusting the recipe by decreasing the flour as even minor changes in quantities in baking can throw everything off. I’d suggest working with smaller amounts at a time, or using a small cookie scoop to scoop and press each cookie down into the mold! I hope this helps! Merry Christmas!
Hi! I tried this recipe but it wasn’t thin enough to pipe! Maybe you should do a weight of flour instead of cups? I really wanted it to work but I ended up having to use a spoon and of course it was so messy and I couldn’t scrape it with a scraper I had to manually wipe the edges. I love the concept though! If I try it again sometime I will lessen the flour.
Have you tried this with royal icing instead of candy melts?
Do you think that instead of using candy melts one could use royal icing?