


Snowflake Sugar Cookies
I love a good sugar cookie this time of year, and these snowflake sugar cookies are the perfect way to enjoy the holiday season with friends and family! I made these cookies using my favorite soft and tender sugar cookies in a Snowflake Mold that I purchased from Amazon, then decorated them with vanilla candy melts and some edible silver dust for a nice, festive touch :) I hope that you enjoy this recipe as much as I do!
How To Make Snowflake Sugar Cookies
My favorite part about this recipe, aside from how delicious they are, is just how easy they are to make! So if intricately decorating sugar cookies isn’t your thing or you’re short on time this holiday season, these Christmas sugar cookies are the perfect recipe for you!
- Prep
- lightly grease your snowflake silicone molds + set them on a cookie sheet
- Preheat oven to 350°F
- Line two baking sheets with parchment
- Make the dough
- whisk flour, baking powder + salt in a bowl
- in another bowl, cream butter + sugar (about 2 mins)
- scrape bowl, add eggs + vanilla, mix again
- Add dry ingredients → mix until a soft, slightly sticky dough forms
- Fill the molds
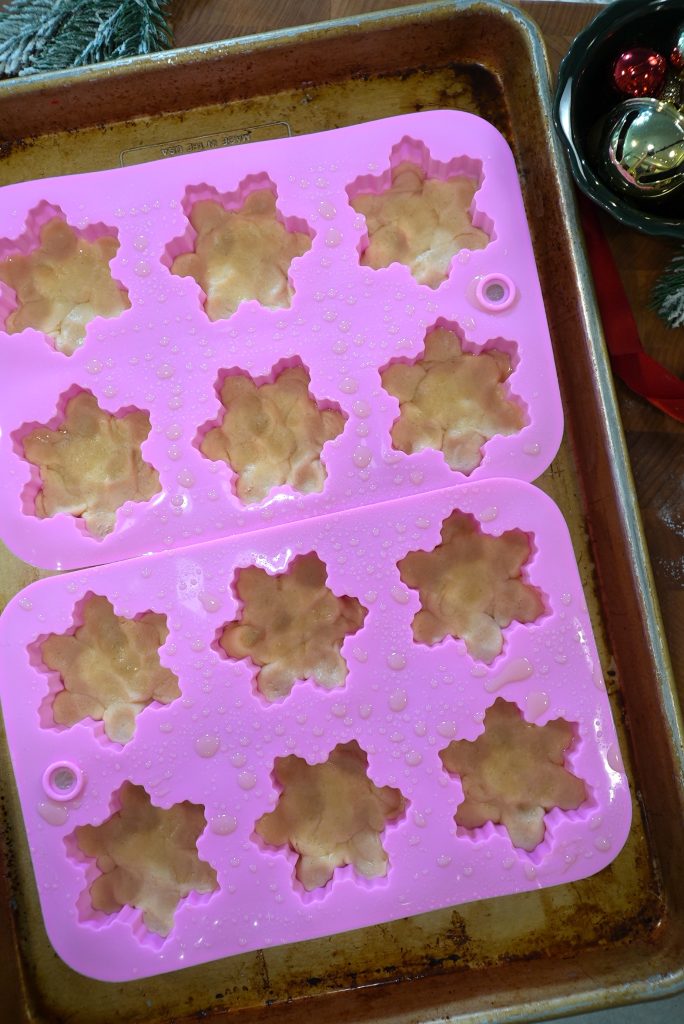
- Scoop dough into molds
- Gently press it into every little snowflake crevice
- Bake
- bake 12–15 mins until edges look lightly golden
- Let cookies cool inside the mold for 15 mins (super important so they don’t break!)
- pop them out + cool fully on a wire rack

- Add the candy melt design
- Melt white + blue candy melts separately in 30-second intervals
- clean + dry your silicone molds
- pipe a thin, even layer (⅛–¼ inch) of candy melts into each mold
- While still wet, press a cooled cookie into the mold on top
- Freeze for about 15 mins so the candy coating sets
- Finish
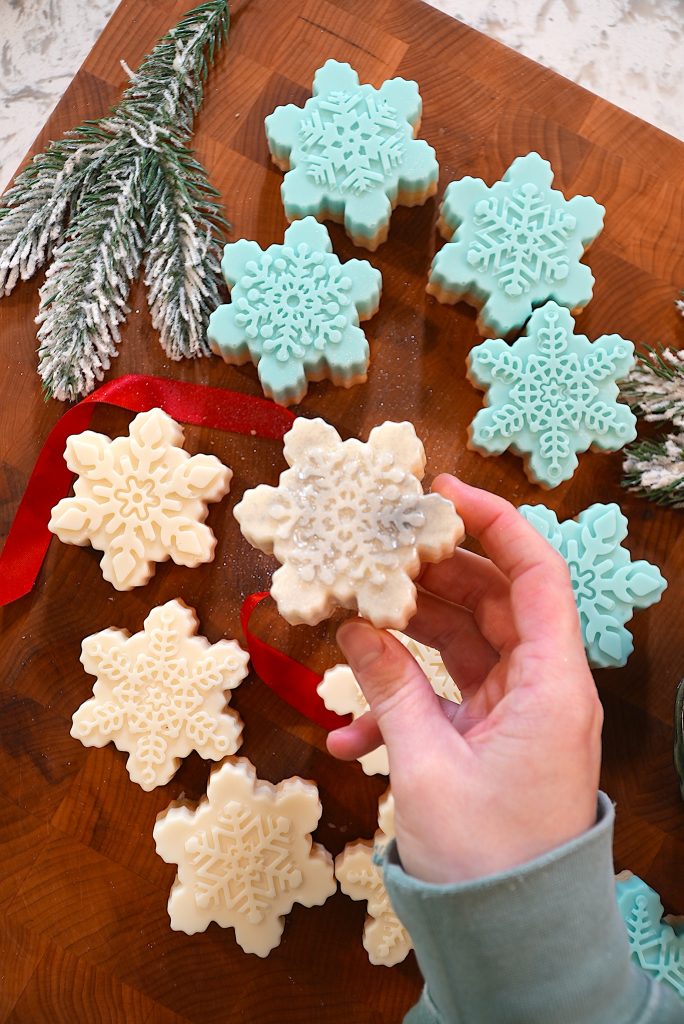
- pop out the cookies to reveal the gorgeous design!! This is the most exciting part! :)
- brush with edible gold dust if you’re feeling fancy
- Enjoy your winter-wonderland treats!
Recipe Tips
- Press the dough all the way into the mold. This ensures the snowflake shape comes out crisp and defined.
- Don’t skip the cooling time in the mold. Warm cookies crack easily.
- Use room-temperature butter + eggs. It makes the dough smooth, not crumbly.
- If the dough feels too sticky, chill it for 10 minutes, and it will become easier to work with.
- Want cleaner candy designs? Use piping bags, not spoons—way more precise.
How to Store Snowflake Sugar Cookies
- Room temperature: store in an airtight container for 4–5 days
- Refrigerator: airtight container up to 1 week
- Freezer: freeze (with candy melts!) for up to 2 months; thaw uncovered so moisture doesn’t dull the shine
Recipe Variations
- All-white snowflakes for a monochrome, frosty look
- Blue base + white accents by marble-swirling the candy melts
- Peppermint twist — add ½ tsp peppermint extract to the dough
- Sparkle snowflakes — brush on edible glitter or dust
- Chocolate version — swap candy melts for dark or milk chocolate melts
Tips for Working With Candy Melts
- Heat low + slow. 30-second microwave bursts prevent burning or clumping.
- If they’re too thick, add a tiny bit of coconut oil to thin them.
- Make sure molds are dry. Any moisture ruins the finish and causes seizing.
- Pipe, don’t pour. You’ll get cleaner edges + sharper details.
- Tap the mold. A few taps on the counter release air bubbles for a smooth design.
More Recipes You Might Enjoy!

Iced Gingerbread Snoopy Cookies

Jingle Bell Sugar Cookies

Chocolate Jingle Bells

Mini Christmas Sugar Cookies

Eggnog Custard Pie

Chocolate Peppermint Brownies

Snowman Macarons

Gingerbread Macarons
Snowflake Sugar Cookies
Join my creative baking community! In depth courses, direct access to me, and more 🤎 Click here to join!
12
servings10
minutes12
minutesKeep the screen of your device on.
Ingredients
3 cups all-purpose flour
2 tsp. baking powder
1/4 tsp. salt
1 cup unsalted butter, softened
1 cup sugar
2 eggs, room temperature
2 tsp. vanilla extract
- Decorating
1 cup white vanilla candy melts
1 cup light blue candy melts
Directions
- Preheat the oven to 350 degrees and lightly grease the snowflake silicone molds. Place these onto a cookie sheet, then set aside. Find the snowflake silicone molds I use here!
- In a medium-sized bowl, whisk together the flour, baking powder, and salt. Set aside.
- In a separate, large bowl, use an electric mixer to cream together the butter and the sugar. About 2 minutes.
- Scrape down the sides of the bowl, then add in the eggs and vanilla. Mix to combine.
- Pour the dry ingredients into the wet mixture and mix until a soft, fully combined dough forms. The dough will be a little sticky – don’t worry.
- Scoop and fill the snowflake silicone molds about halfway full with cookie dough. Press the dough down into the silicone mold to make sure to get the dough into every crevice of the mold.
- Bake for 12-15 minutes or until golden brown on the edges.
- Once they’ve finished baking, let them sit in the molds for about 15 minutes. If you remove them right away while they’re hot, they will crack.
- After about 15 minutes, remove the cookies from the mold, then transfer to a wire rack to cool completely. Wash and dry the molds completely.
- Once the cookies have cooled completely, melt the candy melts separately in 30-second intervals, mixing between each time until completely smooth. Transfer the candy melts to piping bags.
- One at a time, pipe an even layer of candy melts in the mold about 1/8″-1/4″ thick. While the candy melts are still wet, gently place a cookie back in the mold and press the cookie down until it reaches the candy melts.
- Transfer these to the freezer to allow the candy melts to set. Let it sit for about 15-20 minutes in the freezer.
- Gently pop the candy-melt-topped cookies out of their mold. Feel free to decorate with edible glitter for a nice, shiny, festive touch!
- Enjoy!
Equipment
 Snowflake Silicone MoldFind on Amazon!

Did you make this recipe?
I love seeing what you bake on socials! Just tag @thesqueakymixer


Excited to make these! I love all your recipes!