Sea Turtle Cookies
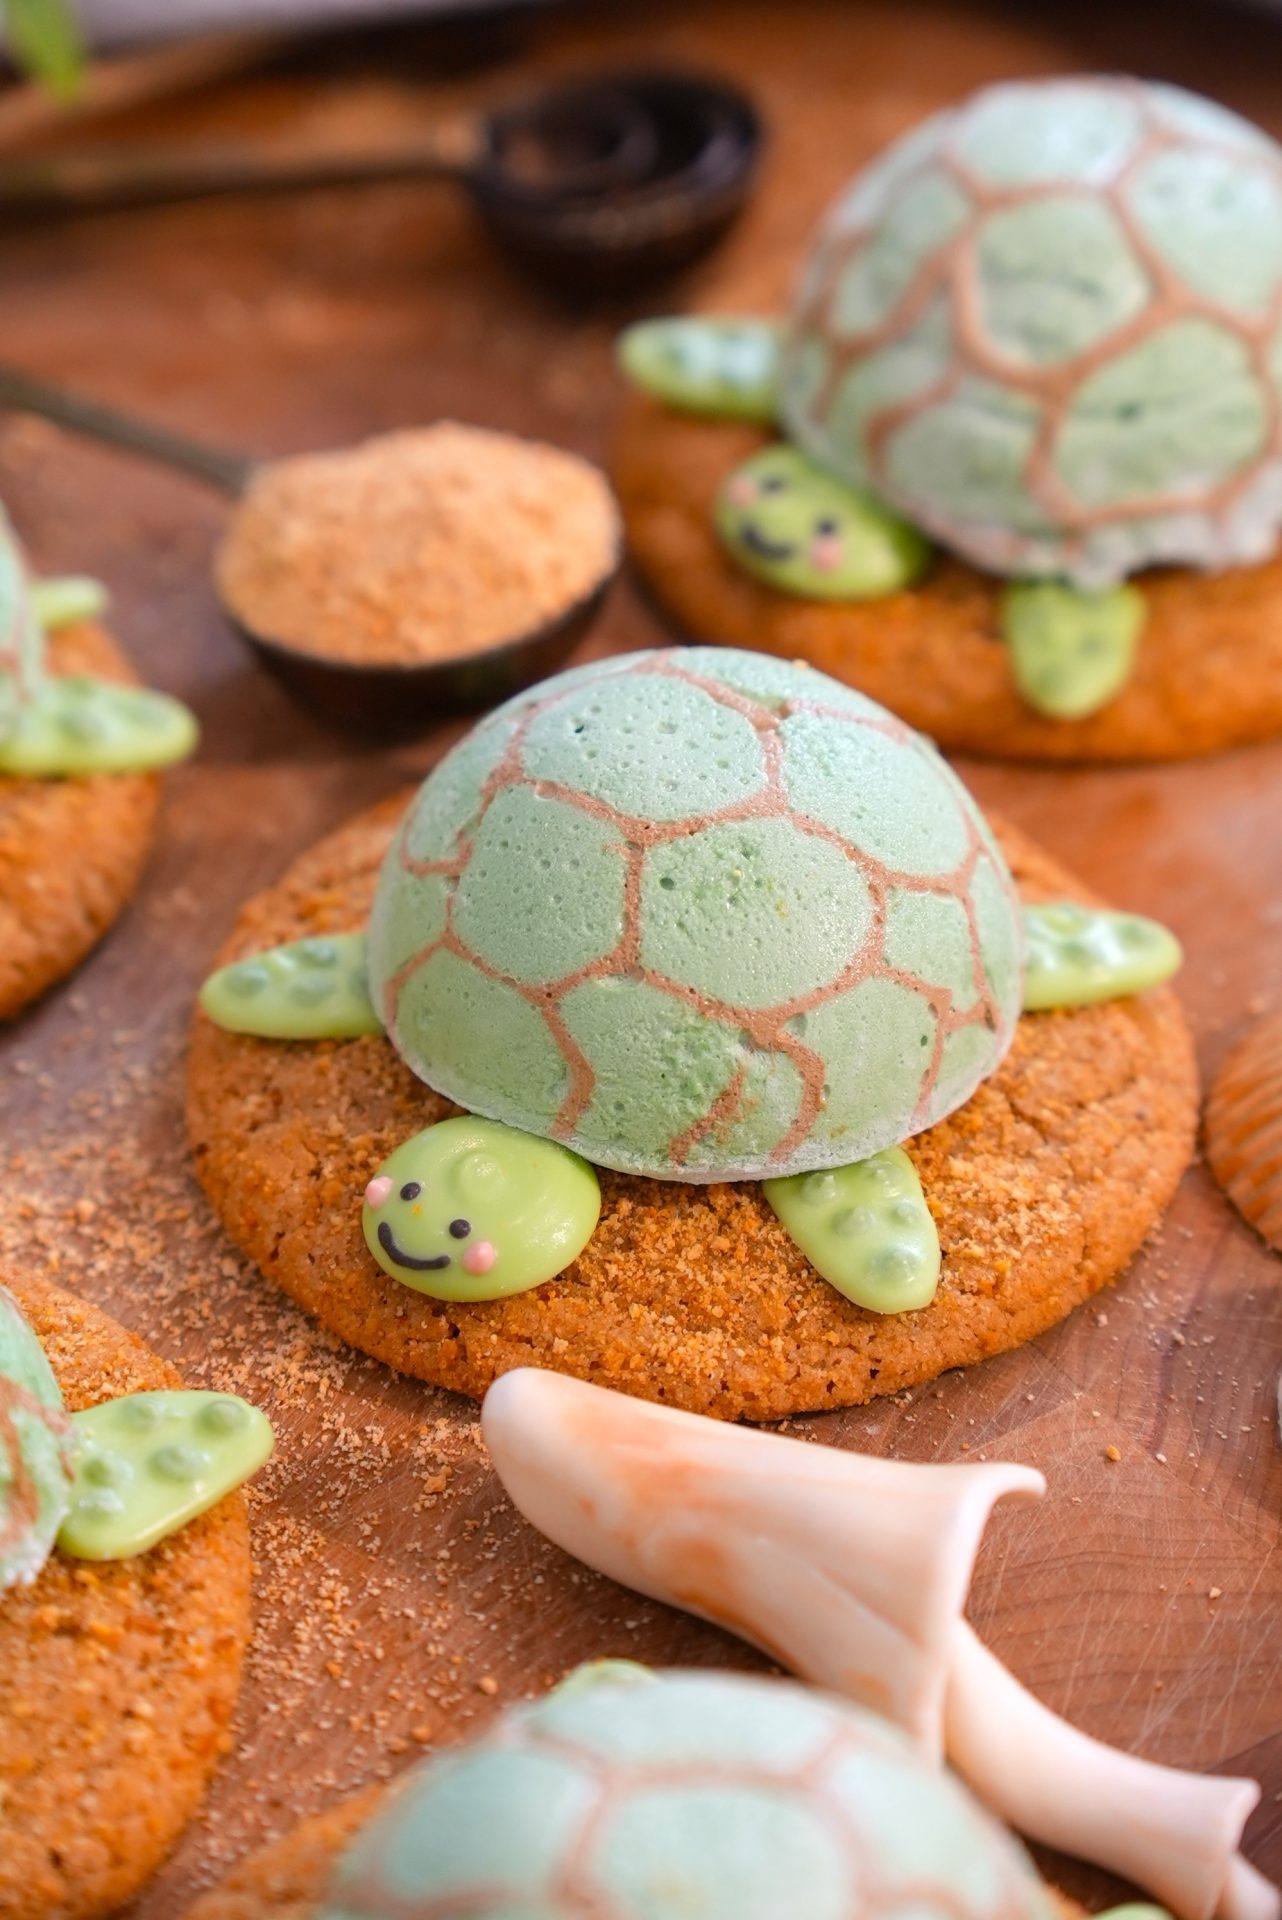
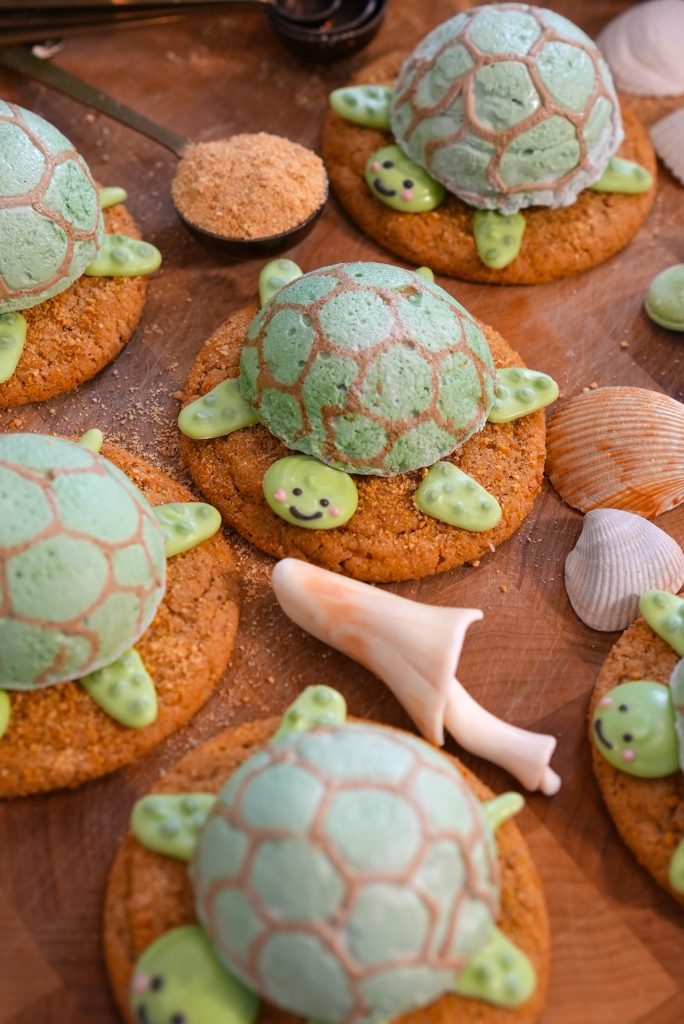
I had a vision for these cookies after talking to my niece. We were talking about some of our favorite animals as she enjoyed a marshmallow from her S’mores Kit, and she brought up sea turtles. So why not combine the two to make these adorable Sea Turtle Cookies! Not only are these cookies adorable, but they are so delicious. It combines a chewy graham cracker cookie and a homemade marshmallow. I hope that you enjoy this recipe as much as I do, and please tag me on social media if you’re ever recreating one of my recipes :) It brings me so much joy!
How To Make Sea Turtle Cookies
Step 1: Prepare the Marshmallow Turtle Shells
…
Step 2: Make the Graham Cracker Cookies
….
Step 3: Create the Turtle Details
…
Step 4: Assemble the Sea Turtle Cookies
…
Recipe Tips
- Use a Candy Thermometer
- Getting the sugar mixture to exactly 242°F–245°F is essential for fluffy marshmallows that hold their shape.
- Work Quickly with Marshmallow
- Homemade marshmallow sets fast. If it becomes too thick while piping, microwave it for a few seconds to loosen it up again. I had to do this a few times to eep the marshmallow at a consistency that’s easier to work with
- Chill the Candy Melt Pieces
- Refrigerating the candy melt decorations makes them easier to remove from the parchment paper without breaking.
- Don’t Overbake the Cookies
- The graham cracker cookies should stay soft and chewy. Pull them from the oven once the edges are lightly golden.
- Use Silicone Molds
- Silicone molds make removing the marshmallow shells incredibly easy and help create the turtle shell texture.
How to Store Sea Turtle Cookies
Room Temperature
Store Sea Turtle Cookies in an airtight container at room temperature for up to 3 days.
Refrigerator
For longer freshness, refrigerate the cookies for up to 1 week. Allow them to come to room temperature before serving for the best texture.
Freezing
You can freeze the graham cracker cookies separately for up to 2 months. However, assembled cookies with marshmallow shells may lose texture after thawing.
Tips for Making Homemade Marshmallows
- Bloom the Gelatin Properly
- Letting the gelatin sit in water for at least 10 minutes ensures smooth marshmallows without lumps.
- Add Hot Sugar Slowly
- Pouring the sugar syrup too quickly can scorch the gelatin or create clumps.
- Whip Until Thick and Glossy
- The marshmallow mixture should become bright white, fluffy, and nearly triple in size before piping.
- Dust Everything with Powdered Sugar
- Powdered sugar prevents sticking and makes handling marshmallows much easier.
Sea Turtle Cookies
Join my creative baking community! In depth courses, direct access to me, and more 🤎 Click here to join!
12-15
servings25
minutes10
minutes2
hoursKeep the screen of your device on.
Ingredients | Marshmallow Shells
2 cups granulated sugar
1/4 cup light corn syrup
1/2 cup water
7 tsp. gelatin (I recommend Knox)
1/2 cup water (for gelatin)
1/4 tsp. salt
2 tsp. vanilla extract
1/4 cup powdered sugar (for dusting)
food dye
- Graham Cracker Cookies
1 1/4 cups all-purpose flour
3/4 cups graham cracker crumbs (plus extra for dusting on top)
1 tsp. cornstarch
1 tsp. ground cinnamon
1/2 tsp. baking soda
1/4 tsp. baking powder
1/2 tsp. ½ salt
1/2 cup unsalted butter (softened)
3/4 cup light brown sugar
1 large egg at room temperature
2 tsp. vanilla extract
- Turtle Details
1/2 cup green candy melts
1 Tbsp. black candy melts
1 Tbsp. light pink candy melts
Directions
- Starting with turtle shell marshmallows. Lightly dust a hot cocoa bomb silicone mold with confectioner’s sugar. Here’s a link to the ones I used – Molds. Set aside.
- In a medium-sized sauce pot, combine the sugar, corn syrup, and water. Give it a little stir to make sure that no sugar is stuck to the bottom and that the mixture is evenly distributed throughout the pot.
- Place this mixture over medium-high heat until it begins to boil.
- As soon as the mixture starts to boil, reduce to medium heat place the lid on, and cover for 2 minutes. Do not lift the lid during the 2 minutes.
- Take the cover off after 2 minutes and place a thermometer inside the pot. Keep the mixture over medium heat until the thermometer reads 242 degrees F. – 245 degrees F.
- While you wait for the mixture to reach the right temp. Place the gelatin and water in the bowl of a stand mixer fit with a whisk attachment. Give the water and gelatin a little mix with a spoon or silicone spatula to ensure that it is combined. Let the gelatin mixture bloom for at least 10 minutes.
- When the sugar mixture reaches the correct temp, take it off the heat and let the bubbles subside.
- After the gelatin has bloomed, slowly add the sugar to the gelatin mixture in the stand mixer while mixing at medium to high speed. Add the hot sugar mixture slowly on one side of the bowl. If you add this all at once it will scorch the gelatin.
- Once all of the sugar mixture has been added, increase the speed to high until the mixture looks white and has doubled in size. Mix this for 3-5 minutes. Add in the vanilla and salt while the mixer is still going.
- While the marshmallow mixture is mixing, prepare a cookie sheet with parchment paper. Dust an even layer of confectioner’s sugar on top of of the cookie sheet. Set aside.
- Add another 2-3 minutes if the mixture hasn’t doubled or tripled in size or looks thin.
- Once the marshmallow mixture is ready, scoop about half of it into a piping bag. Leave the remaining marshmallow mixture in the bowl, add a few drops of green food dye then transfer back to the mixture to combine the color evenly. Separate a little bit more of the marshmallow mixture and dye it darker.
- Place both colors into a piping bag.
- Start by piping small hexagons into the molds using the darker color. If at any point the marshmallow getS too thick – pop it in the microwave for a few seconds to loosen up. I had to do this twice!
- Pipe the light green color over the hexagons.
- Top the fully piped marshmallows with confectioner’s sugar then let them sit in the fridge to firm up for about 45 minutes to an hour.
- Once fully set, gently peel the marshmallows out of the molds. Set aside.
- Graham Cracker Cookies.
- To make the graham cracker cookies, start by preheating the oven to 350 degrees F. Mix the flour, graham cracker crumbs, cornstarch, cinnamon, baking soda, baking powder, and salt. Set aside.
- In a medium-sized bowl, use an electric mixer to cream together the butter and the sugar. About 2 minutes.
- Add the egg and vanilla. Continue to mix. Scrape down the bottom and sides of the bowl to ensure that everything is combining evenly, then add the dry ingredients to the wet. Continue to mix until a nice, soft dough forms.
- Use a scooper to form the dough into about 2 tablespoon-sized balls. Roll them in graham cracker crumbs, then bake for 8-11 minutes. As soon as the cookies have finished baking, dust some more graham cracker crumbs on top.
- Transfer to a wire rack to cool completely.
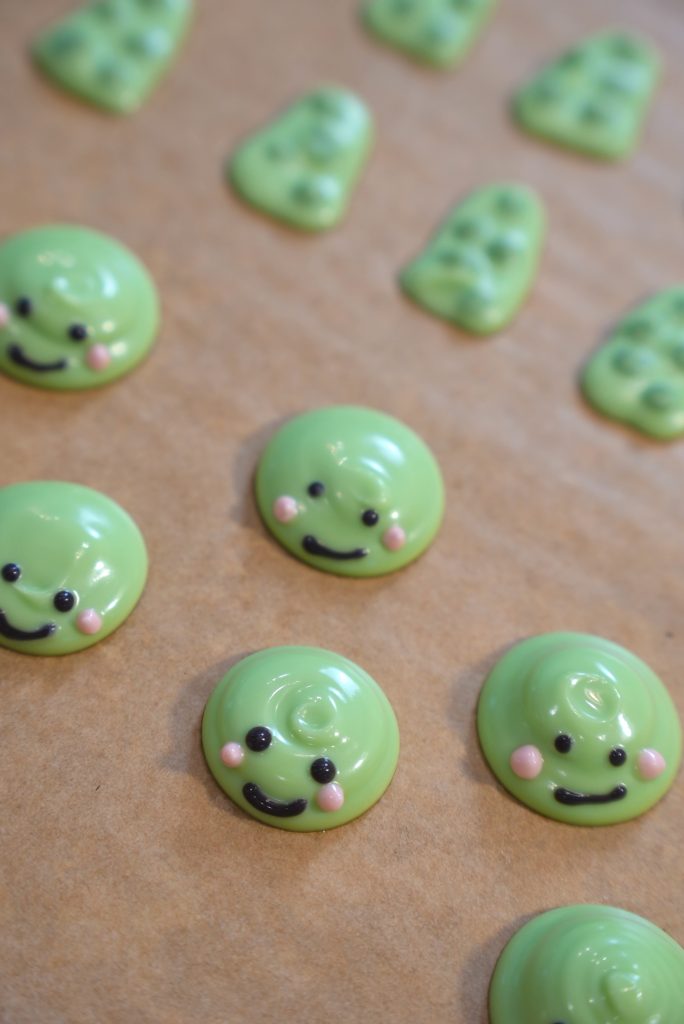
- While the cookies cool, prepare the details for the turtles by microwaving candy melts in 30-second intervals, mixing between each time until fully melted. Transfer the candy melts to a cookie sheet lined with parchment paper and pipe small flippers, heads, and tails. Add facial details to the heads of the turtles. Use the images above as examples for how to decorate these.
- Let the candy melts sit in the fridge for about 10 minutes to firm up. After you can pop them right off the parchment with ease.
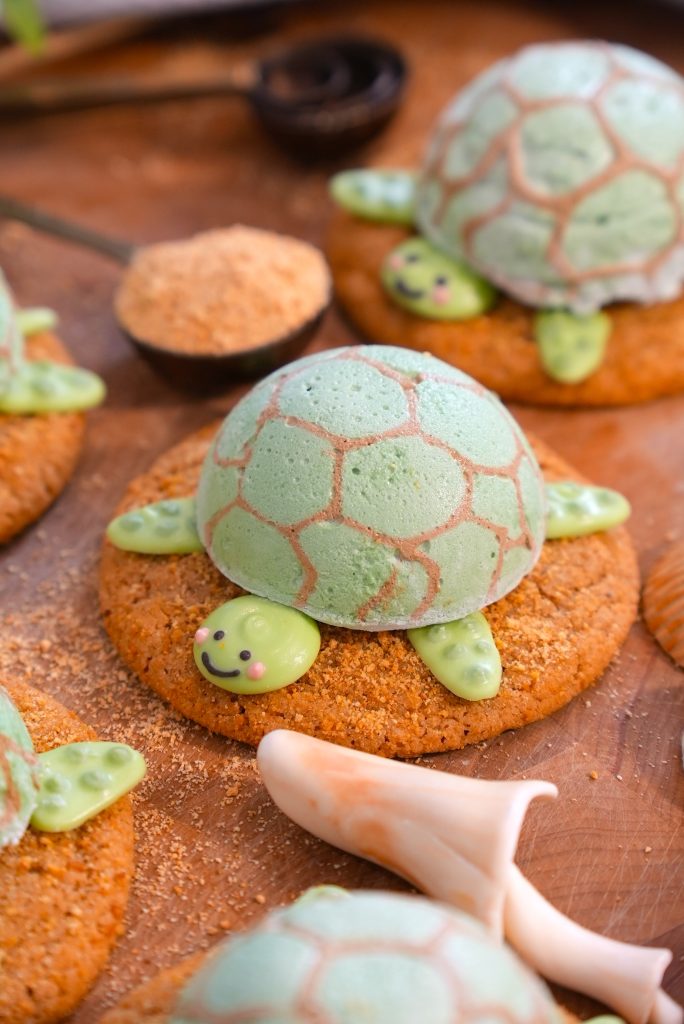
- To assemble these cookies, place a marshmallow shell on top of the cookie, then add the details like the face, flippers, and tail on the sides.
- Repeat for each cookie and enjoy!
Did you make this recipe?
I love seeing what you bake on socials! Just tag @thesqueakymixer