

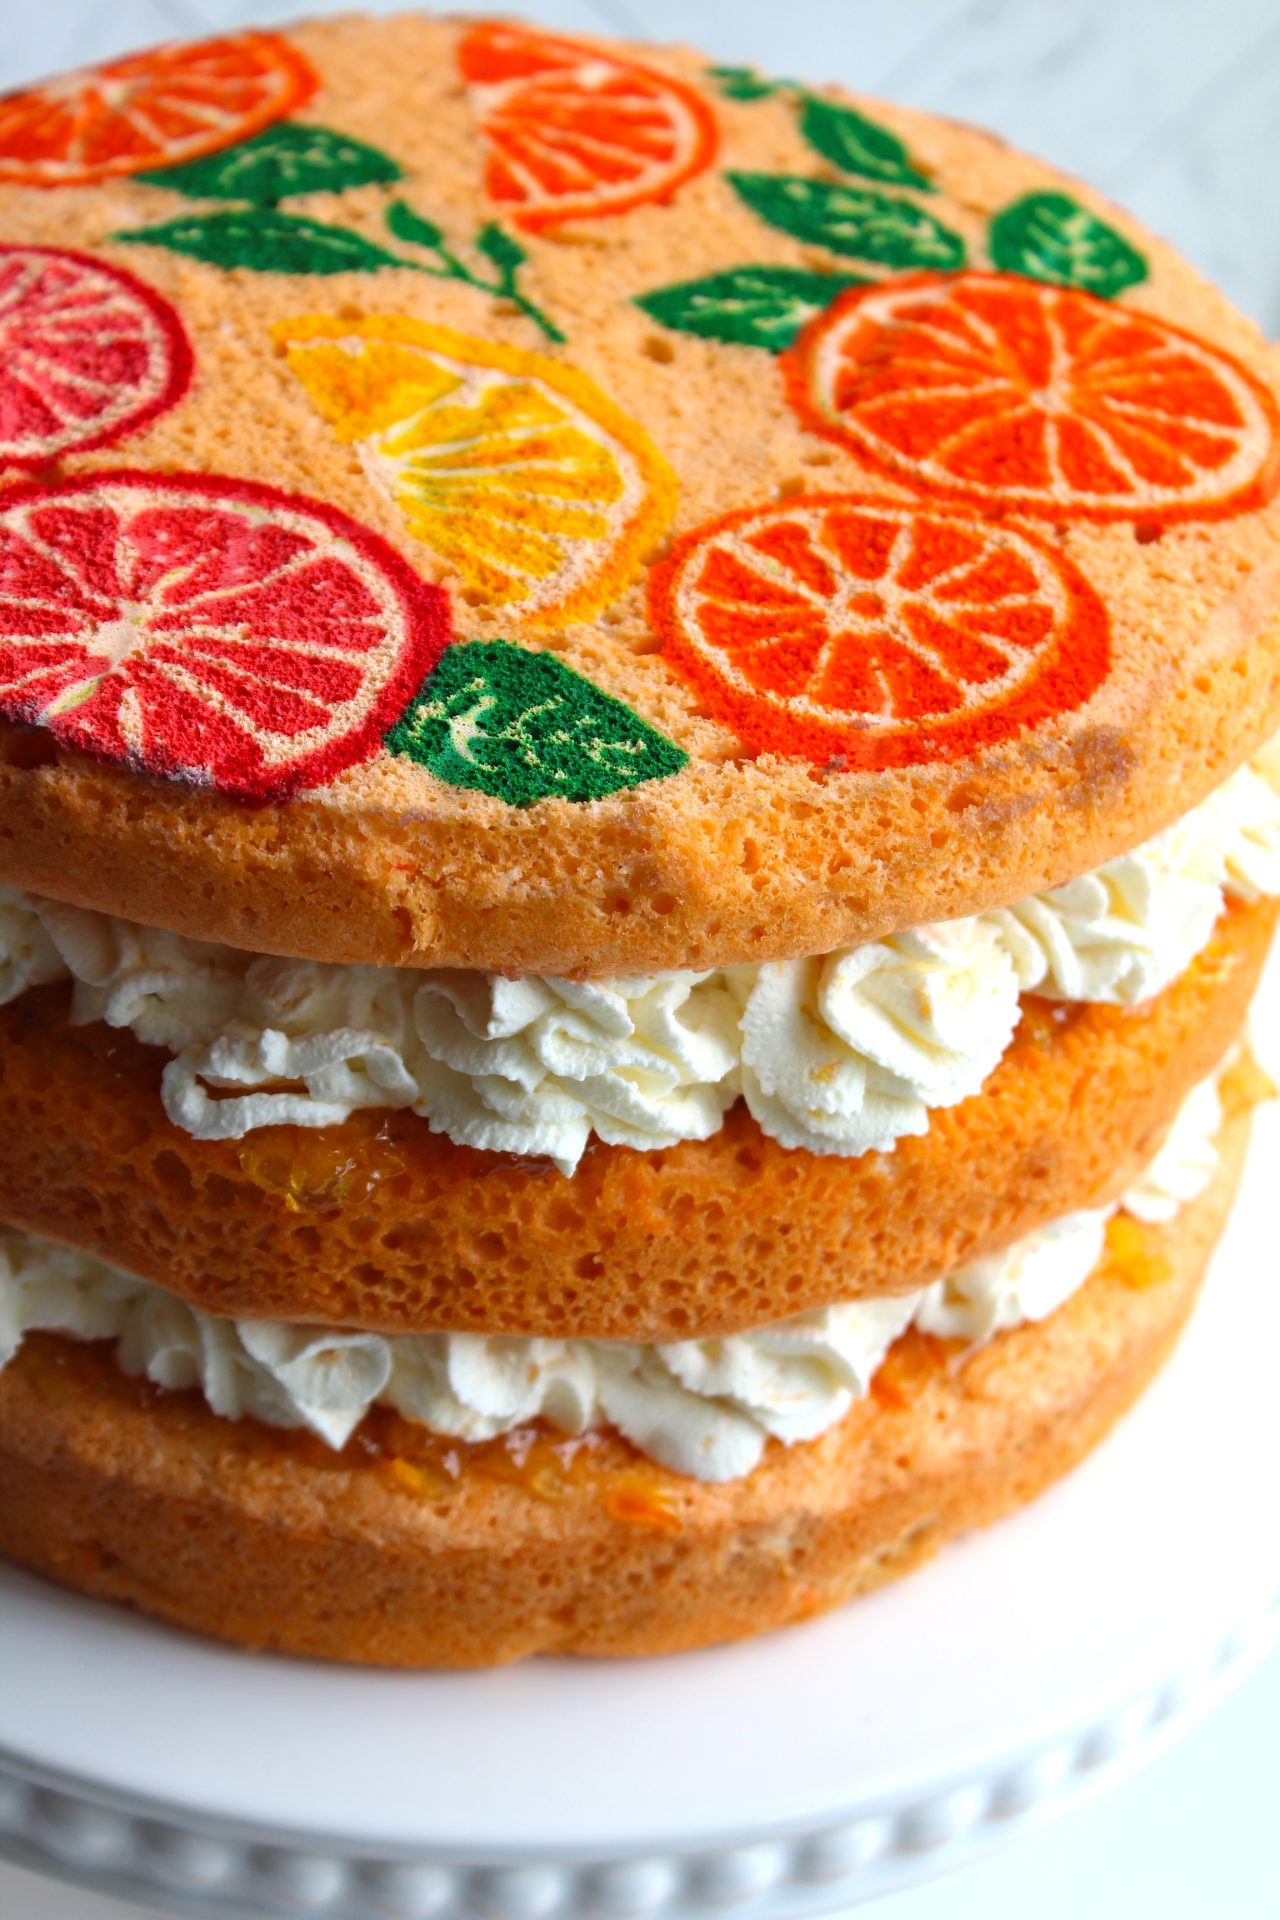
Citrus Designed Sponge Cake
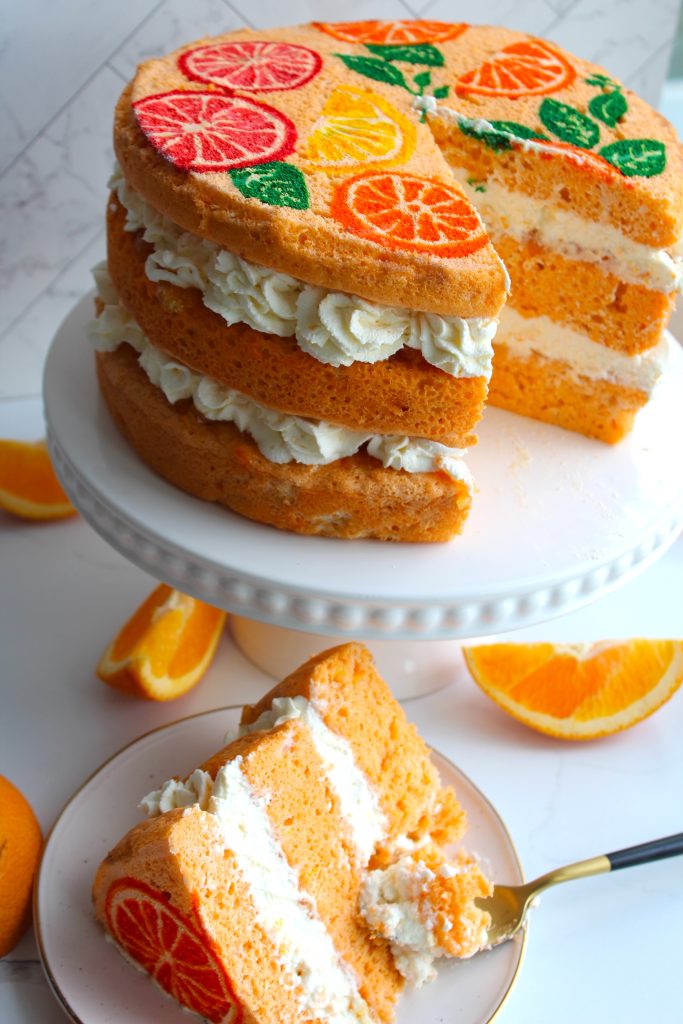
Indulge in this Citrus Designed Sponge Cake’s vibrant flavors and stunning designs. Perfect for any celebration, this cake combines the lightness of a classic sponge with the zesty sweetness of orange marmalade and whipped cream. Let’s get right into how to create this beautiful and delicious cake!
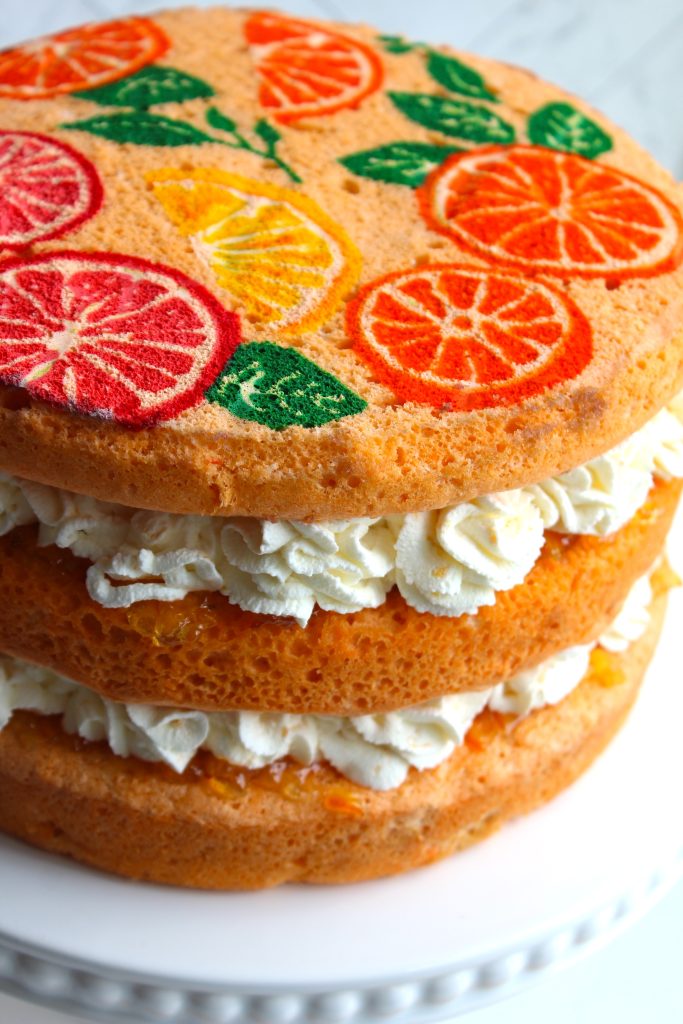
How To Make A Citrus Designed Sponge Cake
- Prepare Your Pan and Design:
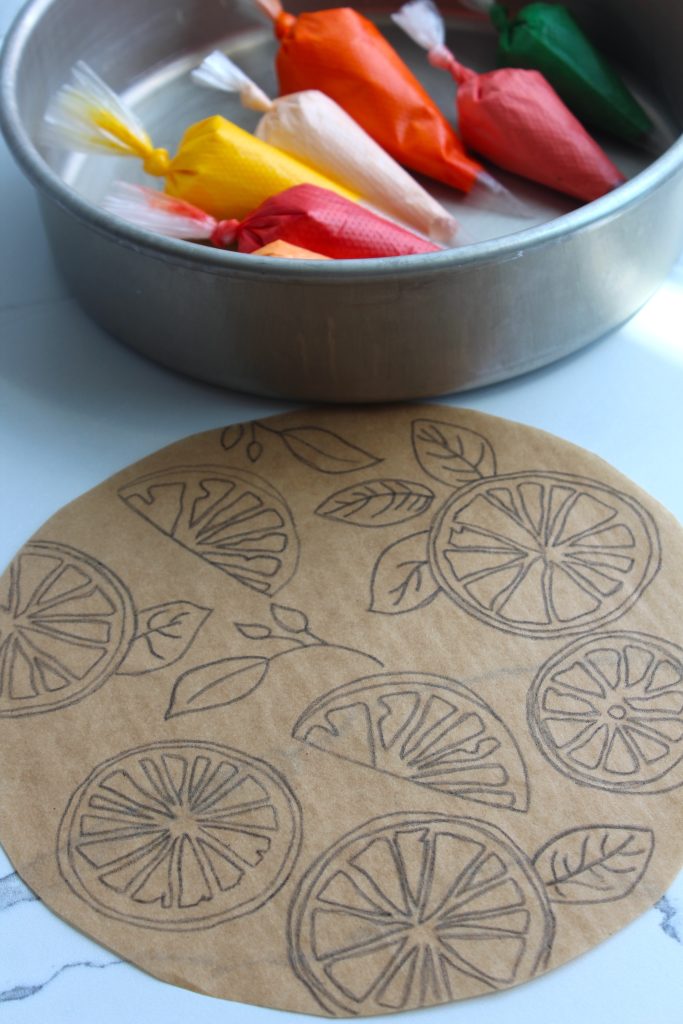
- Cut parchment paper to fit your pan perfectly, then use an edible marker to trace your desired citrus design. I use an 8″ circle pan.
- Preheat the oven to 375 degrees F. Grease your pan with cooking spray and line it with the designed parchment paper. This recipe makes three layers of sponge cake.
- Make the Batter:
- Separate the egg whites from the yolks, placing the whites in a large bowl and the yolks in an even larger bowl. Set the egg whites aside.
- Whisk together the egg yolks, sugar, vegetable oil, milk, and vanilla until smooth. Add a drop of orange gel food dye and whisk to combine.
- Sift the flour and cornstarch into the yolk mixture and whisk until smooth. The batter will be thick. Set aside.
- In the bowl of a stand mixer fitted with a whisk attachment, whisk the egg whites until frothy. Gradually add the sugar and vinegar.
- Continue whisking until stiff peaks form. The peaks should stand straight when the whisk is lifted.
- Gently fold the egg whites into the yolk mixture, being careful not to over-mix. The batter should be smooth with minimal streaks.
- Create and Freeze Your Design:
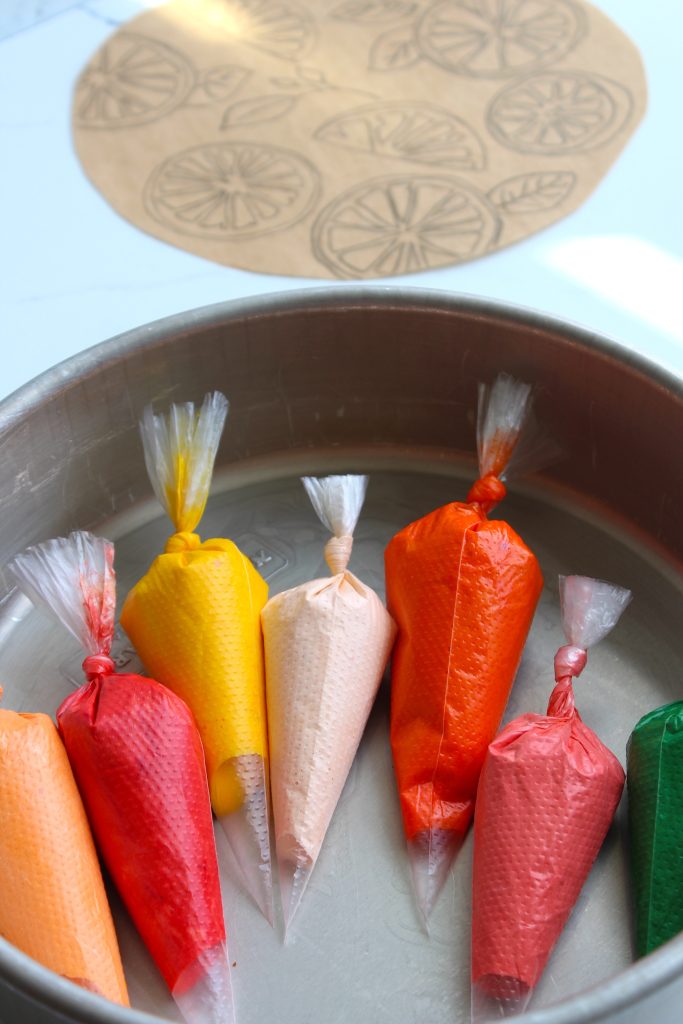
- Divide the batter into small bowls and dye each portion the colors you need for your design. Place each color into a piping bag.
- Pipe your design onto the prepared parchment paper, following your traced outline.
- Freeze the design for 5-8 minutes to set it.
- Bake the Cake:
- Pipe the remaining, uncolored batter over the frozen design.
- Bake for 8-10 minutes or until golden brown on the edges.
- Immediately flip the pan onto parchment paper, revealing the design. Peel off the parchment while the cake is still hot.
- Bake the remaining batter in another pan lined with un-designed parchment paper for the additional layers. Let all layers cool completely.
- Prepare the Whipped Cream Filling:
- In the bowl of a stand mixer fitted with the whisk attachment, whisk the cream, sugar, vanilla, and a dash of salt until stiff peaks form.
- Assemble the Cake:
- Once the cakes have cooled, spread a layer of orange marmalade on each layer. Follow with a generous layer of whipped cream.
- Stack the layers, using the designed layer as the top. Optionally, add fresh fruit between the layers.
- Trim the sides of the cake for a cleaner look if desired.
- Enjoy!
Can I Make This Cake Ahead of Time?
Yes, you can! Making this cake ahead of time is a great way to save time and reduce stress on the day of your event. Here are some tips:
- Bake the Layers: You can bake the sponge cake layers up to two days in advance. Wrap each layer tightly in plastic wrap and store them at room temperature.
- Prepare the Filling: The whipped cream filling can be made a day in advance. Store it in an airtight container in the refrigerator.
- Assemble Close to Serving Time: For the best texture and appearance, assemble the cake on the day you plan to serve it.
How To Store Sponge Cake
This cake is best served as soon as possible. With that being said, this cake can dry out easily. If you plan to make ahead of time or store the leftovers be sure to seal them tightly and keep it fresh in the fridge.
- Refrigerate: If you have leftovers, store the assembled cake in the refrigerator. Cover it with plastic wrap or store it in an airtight container to prevent it from drying out. It will stay fresh for up to 3 days.
- Freeze: To freeze the sponge cake, wrap each layer individually in plastic wrap and place them in a freezer-safe bag. They can be frozen for up to 2 months. Thaw the layers at room temperature before assembling.

Filling Alternatives
While the orange marmalade and whipped cream are delicious, you can experiment with various fillings:
- Lemon Curd: Adds a tangy flavor that pairs well with the citrus design.
- Berry Compote: A mix of fresh berries cooked down with sugar creates a sweet and tart filling.
- Chocolate Ganache: For a richer flavor, try spreading a layer of chocolate ganache between the layers.
- Vanilla Buttercream: A classic choice that adds a creamy texture.
How To Make A Fluffy Sponge Cake
Achieving the perfect fluffy sponge cake is all about technique:
- Whip the Egg Whites Properly: Ensure the egg whites reach stiff peaks. This will provide structure and airiness to your cake.
- Fold Gently: When combining the egg whites with the yolk mixture, fold gently to avoid deflating the batter.
- Don’t Over-Mix: Over-mixing can cause the batter to become dense and heavy. Mix just until the ingredients are combined.
- Bake Immediately: Once the batter is ready, bake it immediately to prevent it from losing volume.
Products I Use
- Piping Bags
- Food Dye
- White Food Dye
- Parchment Paper
- Edible Markers
- 8″ Round Pans
- 1/4 cookie sheet
- 1/2 cookie sheet
- Offset spatula
- Electric Handheld Mixer
- Stand Mixer

Citrus Designed Sponge Cake
Join my creative baking community! In depth courses, direct access to me, and more 🤎 Click here to join!
10-12
servings30
minutes10
minutesKeep the screen of your device on.
Ingredients
12 egg yolks
1/2 cup sugar (for yolk batter)
1/2 cup vegetable oil
1/2 cup whole milk
4 tsp. vanilla extract
2 cups all-purpose flour
1/4 cup cornstarch
1 tsp. white vinegar
12 egg whites
1/2 cup sugar (for egg whites)
gel food dye (not liquid)
- Whipped Cream Filling
1 jar orange marmalade
2 cups heavy whipping cream
5 Tbsp. confectioners sugar
dash salt
2 tsp. vanilla
fresh fruit, optional
Directions
- Cut your parchment paper to fit your pan perfectly then use an edible marker to trace your desired design onto parchment paper. I am using an 8″ circle pan.
- Preheat the oven to 375 degrees F and grease your pan with cooking spray and line it with the designed parchment paper. This makes three layers of sponge cake. You can also just use a standard-size cookie sheet, note that using a standard-size cookie sheet will only make two layers instead of three.
- Separate the egg whites from the egg yolks. We are using every part of the egg in this recipe so hang onto both. Place the egg whites in a large bowl and the egg yolks into an even larger bowl. Set the egg whites aside, we will need them later.
- Whisk together the egg yolks, sugar, vegetable oil, milk, and vanilla until smooth. Add a drop of orange gel food dye to this mixture. Whisk to combine.
- Sift the flour and cornstarch into the egg yolk mixture. Whisk until the batter is nice and smooth. The batter will be thick. Set aside.
- In the bowl of a stand mixer fit with a whisk attachment, whisk the egg whites from earlier until frothy. Slowly add the sugar and vinegar to the egg whites.
- Whisk the egg whites until stiff peaks form. This is very important. Stiff peaks should be able to stand up straight when the whisk is lifted.
- Add the egg whites to the egg yolk mixture. Gently fold in the egg whites. Be careful not to over-mix the batter. Over mixing will deflate the egg whites and make the batter, thin and runny. Mix until the egg whites are just evenly distributed and the batter has few streaks.
- Use small bowls to dye each color that you will need to make your design. Scoop a bit of the batter at a time into these small bowls to make every color you need. Place each color into a piping bag.
- Pipe the design with your desired colors. Do your best to trace the design that you created earlier, with your piping bag.
- Once you have the design finished, freeze it for 5-8 minutes so it sets and is nice and firm.
- Pipe the original, uncolored batter on top of the frozen design.
- Bake for 8-10 minutes or until golden brown on the edges.
- As soon as the cake comes out of the oven, flip the pan onto parchment paper. The design will be facing up. While the cake is still hot, peel off the parchment paper to reveal the beautiful design. Bake the remaining batter on the same-size pan fit with un-designed parchment paper. The other layers do not need designs since they will be hidden in the layers. They will bake the same way. Let the cakes cool before assembling.
- To make the Whipped Cream, in the bowl of a stand mixer fit with the whisk attachment, whisk the cream, sugar, and vanilla until stiff peaks have formed and you have reached a whipped cream consistency.
- Once the cakes have cooled, layer the cakes with evenly spread a layer of orange marmalade on top then spread or pipe the whipped cream between each layer, adding fresh fruit is optional. Use the designed sheet cake as the top layer.
- Feel free to trim the sides to clean it up a bit if you wish to give the cake a more complete look.
- Enjoy!
Did you make this recipe?
I love seeing what you bake on socials! Just tag @thesqueakymixer


do you have a video of piping the citrus design?
my cake lost the design of the white lines ….
Hello Maddison,
Please I wanted to ask a question about your Sponge cakes, specifically the Citrus Sponge cake.
I wanted to get double the batter, do I just double everything in the recipe list or is there specific measurements for some ingredients.
Please I would appreciate an answer soon I want to make a cake for the weekend and I stumbled across your page
Hi there – if you need to double a recipe, then everything in the recipe ingredients needs to be doubled. I don’t recommend doubling this recipe as you will have SOO much batter to work with. This will increase the chances of the egg whites in the batter deflating. If you need more batter after the first batch then I recommend making a second batch after, separately. I hope this helps!!