

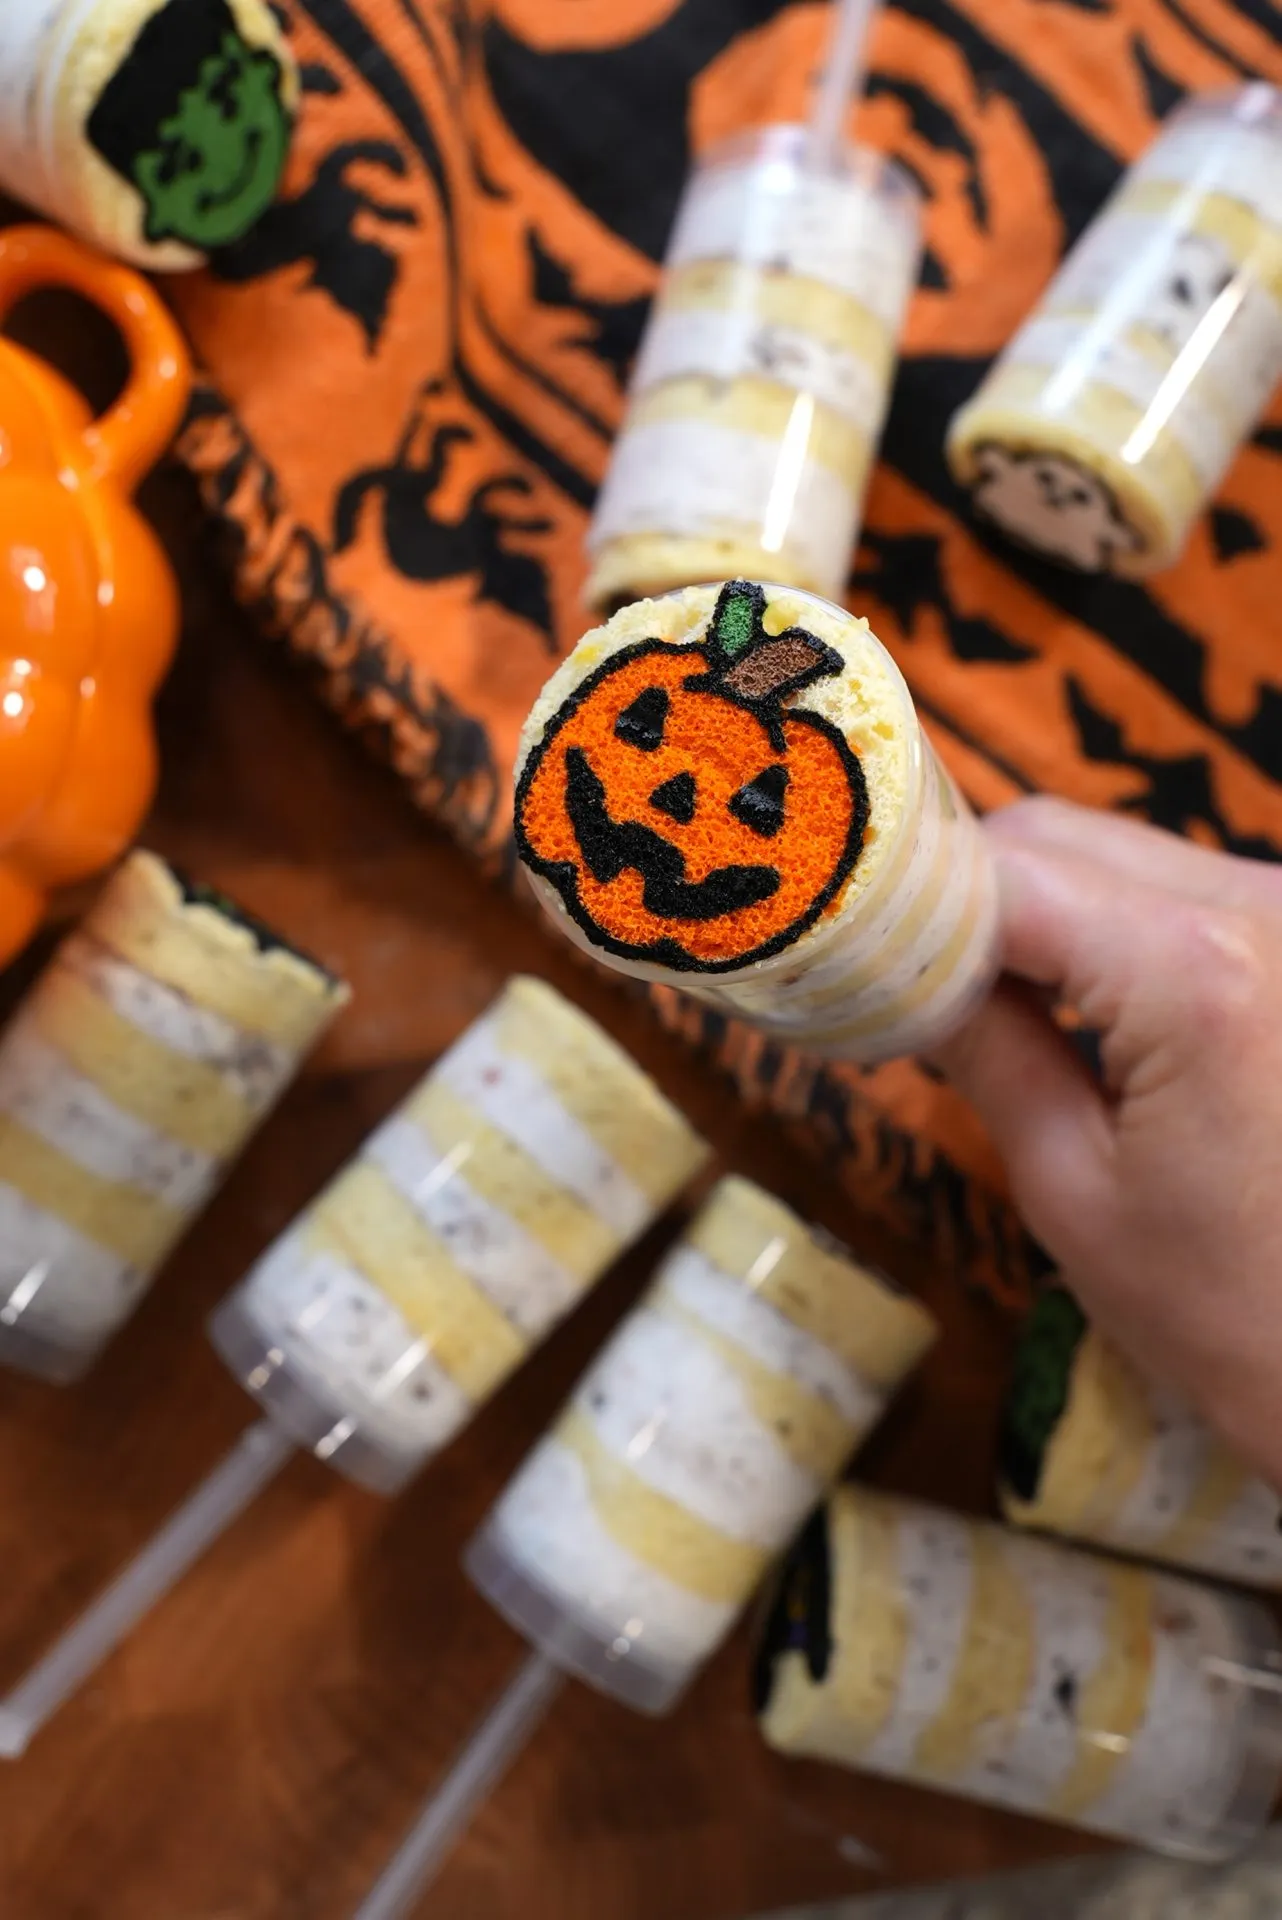
Halloween Cake Push-Pops
Push-pops don’t always have to be a frozen treat! In this recipe, we layer sponge cake with cookies-and-cream buttercream, then top the pop with a designed sponge cake circle. They’re almost too cute to eat :) The best part about this recipe is that you can customize the flavors and designs so you can make them year-round. I hope that you enjoy this recipe as much as I do! While you’re here, feel free to check out my Master Guide for Designed Sponge Cakes!

Why You’ll Love This Recipe!
- The Halloween designs bake directly into the cake, so no fondant, no royal icing, and no decorating skills required
- Push pops are completely mess-free, which makes them perfect for school parties and toddlers
- The sponge cake is soft and light instead of dense, so it’s perfect for a little treat
- The Oreo whipped cream comes together in about five minutes in a stand mixer, not to mention the Halloween Oreos are so much fun (and way better than regular ones) :)
- Everything can be made a day ahead and assembled right before serving
- One 18 by 13 inch sheet of cake makes roughly 10-12 push pops, so it comes out perfectly for a crowd

How To Store Halloween Cake Push-Pops
Because they are filled with fresh whipped cream, Halloween Cake Push Pops need to be kept in the refrigerator. Cap each one with its lid and store them upright in the fridge, where they will stay fresh for up to 3 days. A tall container, a drinking glass, or a push pop stand all work well for keeping them from tipping over and smashing the design on top.
If you are assembling ahead for a party, know that the cake will slowly absorb moisture from the whipped cream over time. At the 24-hour mark, the texture is still lovely, just softer than it was fresh. After 48 hours, the layers start to blur together. For the sharpest-looking layers, assemble the morning of your event.
For storing the components separately for prepping ahead of time:
- Baked cake: wrap the full sheet tightly in plastic wrap and keep it at room temperature for up to 2 days, or refrigerate it for up to 4 days
- Cut cake circles: stack them with small squares of parchment between the layers in an airtight container and refrigerate
- Oreo whipped cream: store in an airtight container in the fridge for up to 2 days, then re-whisk briefly by hand before piping if it has loosened
- Freezing: the plain baked cake freezes well for up to 2 months when wrapped in plastic and then foil, though the whipped cream does not freeze and thaw nicely

Recipe Tips
- A thick yolk batter is correct. After the flour and cornstarch go in, the mixture will feel heavy and almost paste-like. Resist the urge to thin it out, because the meringue is what lightens it in the next step.
- Stop folding while streaks remain. A few visible streaks of white are the finish line here. Folding until the batter looks perfectly uniform means you have already gone too far and knocked the air out.
- Do not skip the freezer step. Five minutes is all it takes to set the piped designs, and it is what keeps them from blurring when the main batter goes on top.
- Watch the bake time closely. This is a thin cake, and the window between done and overbaked is small. Overbaking is the number one reason designs stick to the parchment.
- Flip while the cake is still warm. Running a knife around the edges and turning it out promptly keeps the edges from drying and cracking.
- Cool completely before cutting. Warm cake compresses and tears under the push pop container, and warm cake will melt whipped cream on contact.

Whipped Cream Variations
- Pumpkin spice whipped cream. Fold in 1/3 cup pumpkin puree and 1 teaspoon pumpkin pie spice after the cream reaches stiff peaks. Whip the cream slightly stiffer than usual first, since the puree loosens it.
- Chocolate whipped cream. Sift 1/4 cup unsweetened cocoa powder in with the confectioners sugar before whipping. Deep brown against orange designs looks fantastic through the plastic.
- Caramel whipped cream. Drizzle in 3 tablespoons of thick caramel sauce at the very end and fold gently for a ribboned effect.
Tools I Used
- Push Pop Containers
- Piping Bags
- Food Dye
- White Food Dye
- Parchment Paper
- Edible Markers
- Electric Handheld Mixer
- Stand Mixer

Halloween Cake Push-Pops
Join my creative baking community! In depth courses, direct access to me, and more 🤎 Click here to join!
8-10
servings20
minutes10
minutes1
hour10
minutesKeep the screen of your device on.
Ingredients
12 egg yolks
1/2 cup sugar (for yolk batter)
1/2 cup vegetable oil
1/2 cup whole milk
4 tsp. vanilla extract
2 cups all-purpose flour
1/4 cup cornstarch
1 tsp. white vinegar
12 egg whites
1/2 cup sugar (for egg whites)
gel food dye (not liquid)
- Whipped Cream
2 cups heavy whipping cream
5 Tbsp. confectioners sugar
dash salt
2 tsp. vanilla
10 -15 Halloween Oreos, crushed
Directions
- Find the push pops I used on Amazon here!
- Preheat the oven to 375 degrees F. Prepare the parchment paper by cutting it to fit perfectly inside a standard 18″ x 13″ cookie sheet. Once this fits your pan perfectly, use an edible marker to draw or trace 15 small designs that fit the size of the circle on our push pops. Find the graphic above for the Halloween designs I used. Find links to ALL of the products I used, right above this recipe card. Grease the cookie sheet and place the parchment paper design side down. Work out any creases, then set aside.
- Separate the egg whites from the egg yolks. We are using every part of the egg in this recipe, so hang onto both. Place the egg whites in a large bowl and the egg yolks into an even larger bowl. Set the egg whites aside; we will need them later.
- Whisk together the egg yolks, sugar, vegetable oil, milk, and vanilla until smooth.
- Sift the flour and cornstarch into the egg yolk mixture. Whisk until the batter is nice and smooth. The batter will be thick. Set aside.
- In the bowl of a stand mixer fitted with a whisk attachment, whisk the egg whites from earlier until frothy. Slowly add the sugar and vinegar to the egg whites.
- Whisk the egg whites until stiff peaks form. This is very important. Stiff peaks should be able to stand up straight when the whisk is lifted.
- Add the egg whites to the egg yolk mixture. Gently fold in the egg whites. Be careful not to over-mix the batter. Overmixing will deflate the egg whites and make the batter thin and runny. Mix until the egg whites are just evenly distributed and the batter has a few streaks.
- Use small bowls to dye each color that you will need to make your design. Scoop a bit of the batter at a time into these small bowls to make every color you need. Place each color into a piping bag.
- Pipe the designs with your desired colors. Do your best to trace the designs that you created earlier with your piping bag.
- Once you’ve finished piping the small designs, set the cookie sheet in the freezer to set for about 5 minutes.
- Pipe or gently pour the batter on top of the design. Make sure it’s distributed evenly, but avoid spreading the batter with a spatula to smooth it out, as you could smudge the designs underneath.
- Bake for 10-12 minutes or until the top of the cake looks just barely golden brown. Do not over-bake or the design will stick to the parchment paper.
- Once finished baking, run a butter knife along the sides of the pan, then flip onto a sheet of parchment paper.
- Peel back the parchment paper that the cake was baked on to reveal the designs and your cake.
- Allow this to cool completely.
- You can make the whipped cream in the meantime. To make the Whipped Cream, in the bowl of a stand mixer fitted with the whisk attachment, whisk the cream, sugar, and vanilla until stiff peaks have formed and you have reached a whipped cream consistency. Add the crushed Oreos and fold into the whipped cream. Place this into a piping bag. Set aside.
- One at a time, use the push pop to cut out the perfectly sized circles from the cake, including the designed parts.
- To assemble the cake push pops, start with a layer of cake. Use a push pop insert to press the cake to the very bottom. Pipe a layer of whipped cream, add another piece of cake, more whipped cream, then top the push pop with a designed piece of cake. Repeat these steps for each one.
- Enjoy!
Did you make this recipe?
I love seeing what you bake on socials! Just tag @thesqueakymixer


