

Frosted Easter Sugar Cookies
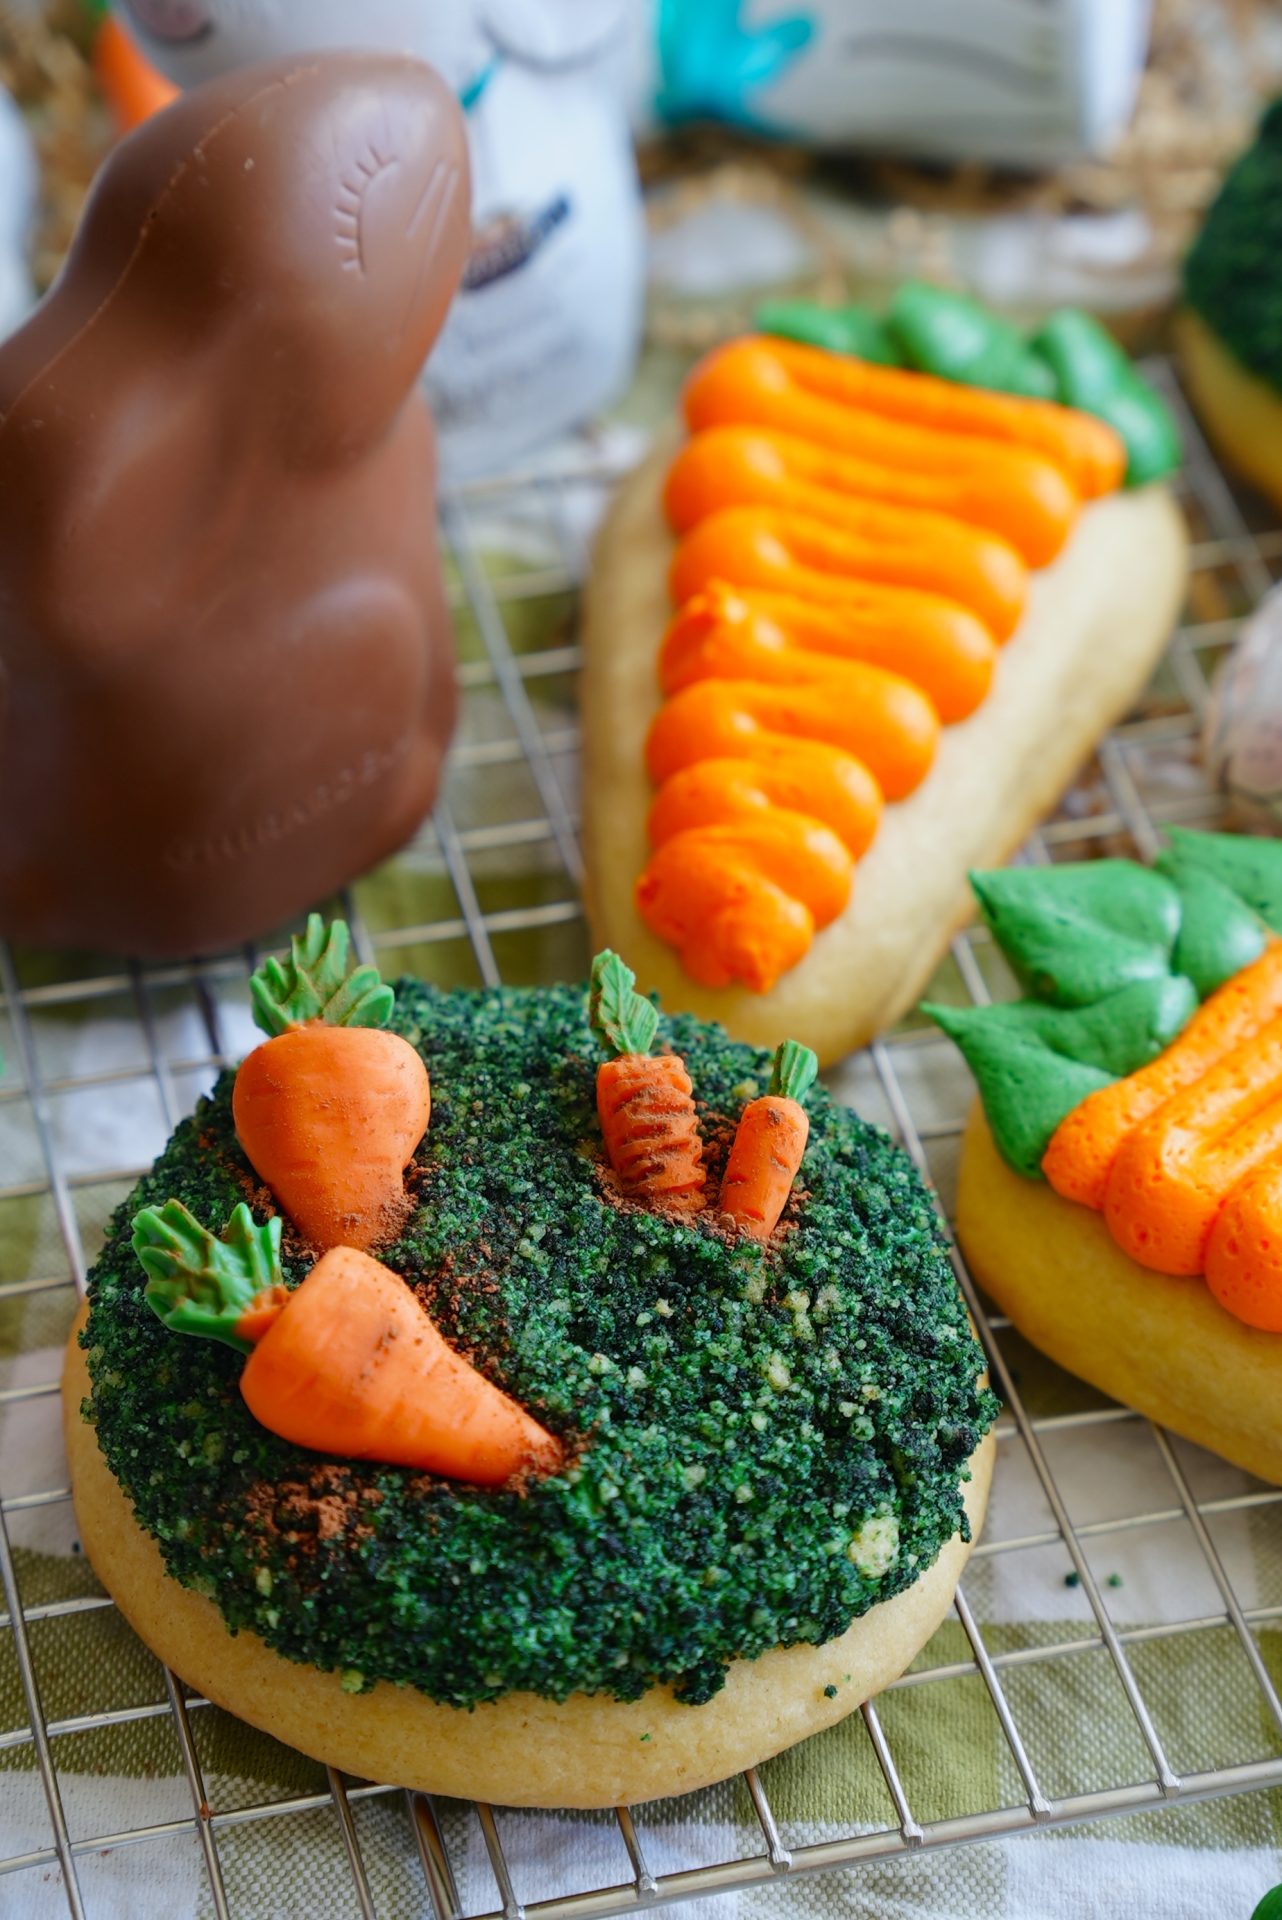
If you are looking for a delicious frosted sugar cookie recipe to bake up this Easter, let it be this one! These cookies are thick and cakey and topped with a delicously sweet, vanilla-forward buttercream and decorated to perfection with candy melt carrots and a dusting of cocoa powder to tie everything together. You can make this recipe ahead of time or the day of, and either way, you’ll be left with a delicious Easter Sugar Cookie :)

How To Make Easter Sugar Cookies
I’ve made this sugar cookie recipe soooo many times, and they kinda remind me of a Crumbl-style cookie because of their thickness and just overall size, but of course, the taste is so much better because they’re homemade and made with common household baking ingredients.
- Make the sugar cookies
- This is a typical, classic sugar cookie recipe. The balls of dough are larger than normal, but as I mentioned before, they are like a crumbl-style cookie, so they are large in size, which makes their texture delicious and cakey. Let the cookies cool completely before decorating!
- Crush up one or two of the cookies after baking and add some food gel, and combine completely. This is going to mimic grass when we decorate later on.
- Make the buttercream
- using room temperature ingredients is key so that the buttercream comes together nicely and with no lumps. I use Americolor food gel to dye my buttercream. A little bit of this food dye goes a long way to give you have beautiful colors without the taste of food dye.
- Make candy melt carrots
- Melt down green and orange candy melts in 30-second intervals until completely melted and pipe into the carrot molds. CLICK HERE for the link to the candy melts!
- Decorate
- Time to bring everything together!! My favorite part :) Frost your cookies, dip them in crushed cookies, add candy melt carrots, and dust with cocoa powder.

Tips for decorating easter sugar cookies
- Chill your candy melts slightly before piping if they’re too runny
- Use a piping bag for cleaner, more defined frosting instead of spreading
- Don’t overbake the cookies! These cookies have such a soft and cakey texture, and not overbaking them helps to prevent them from getting a harder texture.
- Press the center immediately after baking, while the cookies are still warm
- Mix different shades of green for a more natural grass look :)
How to store Frosted Easter Sugar Cookies
- Store decorated cookies in an airtight container at room temperature for up to 3 days
- If stacking, place parchment paper between layers to protect the frosting
- You can refrigerate them for up to 5 days, but let them come to room temp before serving for the best texture
- Unfrosted cookies can be frozen for up to 2 months

Can I make this recipe ahead of time?
You can totally make this recipe ahead of time! In fact, these cookies store great and super easily, so it makes them the perfect recipe to prep ahead of time.
- Make the dough up to 2 days ahead and store in the refrigerator
- Baked cookies can be made 1–2 days in advance and decorated later
- Buttercream can be made ahead and stored in the fridge (just rewhip before using)
- Candy melt carrots can be made several days ahead and stored in an airtight container
Frosted Easter Sugar Cookies
Join my creative baking community! In depth courses, direct access to me, and more 🤎 Click here to join!
12-15
servings10
minutes10
minutes2
hoursKeep the screen of your device on.
Ingredients | Sugar Cookies
3 cups all-purpose flour
2 tsp. baking powder
1/4 tsp. salt
1 cup unsalted butter, softened
1 cup sugar
2 eggs, room temperature
2 tsp. vanilla extract
- Vanilla Buttercream
1/2 cup unsalted butter, room temperature
3 1/2 cups confectioner’s sugar
2 tsp. vanilla extract
1/4 tsp. salt
2 -3Tbsp. heavy whipping cream
green gel food dye
- Candy Melt Carrots
1/2 cup orange candy melts
1/4 cup green candy melts
cocoa powder (for dusting on top)
Directions
- Preheat the oven to 350 degrees F and line two cookie sheets with parchment paper. Set aside.
- In a medium-sized bowl, whisk together the flour, baking powder, and salt. Set aside.
- In a separate, large bowl, use an electric mixer to cream together the butter and the sugar. About 2 minutes.
- Scrape down the sides of the bowl, then add in the eggs and vanilla. Mix to combine.
- Pour the dry ingredients into the wet mixture and mix until a soft, fully combined dough forms. The dough will be a little sticky – don’t worry.
- Scoop and roll the cookie dough into about 4 Tbsp.-sized balls. Place them about 2″ apart on the prepared cookie sheet. Use the palm of your hand to gently flatten them each slightly.
- Bake the cookies for about 12 minutes or until lightly golden brown on the sides. As soon as the cookies have come out of the oven, use a 1/4 cup measuring cup to press gently in the center of every cookie, being careful not to crack the cookie too much.
- Allow the cookies to cool completely on a wire rack before decorating.
- Take one to two cookies and crumble them with your hands until it’s broken down into a fine crumb. Add green food gel to this mixture. We’ll dip our frosted cookies in this later on for a grassy look.
- Vanilla Buttercream
- To make the buttercream, cream the butter together with an electric mixer or in the bowl of a stand mixer fitted with the paddle attachment until smooth. Add the confectioner’s sugar, vanilla, and salt. Gradually add one tablespoon of heavy cream at a time until the buttercream starts to come together. Add green food dye until it reaches your desired shade of green. Use a silicone spatula to scrape the sides and bottom of the bowl as you mix. Cover and set aside.
- Candy Melt Carrots
- Here is the link to the carrot silicone mold I used from Amazon, click here!
- Melt the candy melts down separately in 30-second intervals, mixing between each time until completely melted. Once fully melted, place each color into a piping bag.
- One carrot at a time, pipe the mold filling it with green and orange candy melts, transfer to the freezer once filled, and let harden for 15-20 minutes, then simply pop them out of the mold. Repeat until all of your candy melts are used up. You may need to reheat your candy melts a few times as it cools and harden quickly between uses.
- Decorating & Assembling
- To decorate our cookies, spread or pipe an even layer of buttercream onto the cookie, reaching just before the edges. Dip the cookie in the dyed, crumbled cookie mixture. Top each cookie with a few candy melt carrots, then dust some cocoa powder on top to look like dirt where the carrots are. Repeat for each one!
- Enjoy!
Did you make this recipe?
I love seeing what you bake on socials! Just tag @thesqueakymixer


